Digital Production Services Homepage Brown University Library Homepage Brown University Homepage

c u r i o

Imaging rare, unusual, and intriguing objects at the Brown University Library

Napoleon’s Death Mask

January 23, 2013 by | 4 Comments

While the bulk of my work involves the digitization of two-dimensional documents, or straightforward photographs of pages from books, I also photograph other types of items – like the 360 degree photography, and the interiors that I have posted about. Every once in a while, I get more unusual requests. Since I am usually the person who handles three-dimensional items, I get to photograph some of the most interesting – and unexpected – items from our collections.

Two years before this shoot, I actually photographed a portrait of Napoleon; an oil painting by Vernet in a gold-colored frame with the familiar bee (a symbol of immortality and resurrection) carved onto the front. It’s a part of the William Henry Hoffman Collection on Napoleon I and it’s absolutely stunning. Actually, the entire collection (of approximately 600 items) is fascinating, so I was excited when I was called over to look at an object that needed digitization. I was a little surprised to find it was not exactly a portrait of Napoleon; it was a plaster cast of his death mask. The request had come internally; we have a series of talks on our Special Collections at Brown, and this image was to help publicize and showcase a talk on the mask, given by Peter Harrington, curator of the Anne S.K. Brown Military Collection.

I had to bring it back to my studio at DPS to photograph, as I needed better light than I could get in the room the mask is stored in. I set everything up before bringing the mask out of its box; I was using hot lights, and the less exposure the mask has to the heat and drying nature of the lights, the better. Using a stack of books about the same size and shape of the mask, I set up foam to cushion it on a low table, set up lights equidistant and at the same angle to the object, and utilized the horizontal arm of our tripod so that I could shoot straight down onto the object. I used a color checker card to make sure that my white balance and exposure was correct, I tripled-checked the depth of field and focus, and then was ready to go.

As is often the case when dealing with unique objects, the setup took much longer than the actual photography. I replaced the books very carefully with the mask, took approximately 10 shots at slightly different exposures and focuses at three different angles. I ended up with a high resolution photograph of the death mask, and a great response when people asked me what I was bringing around the library in a box.

Interior Designs

January 4, 2013 by | 1 Comment

Much of the work that we do here at DPS involves objects and items from the Brown Library’s Special Collections. These are housed in the John Hay Library, which just recently celebrated its Centennial. It is a gorgeous building, and many of the simple, white wooden doors belie the beautifully curated spaces beyond.

The Bruhn Memorial Reading Room is one such room. When I was asked for photograph it for Brown’s new version of the History & Guide to Special Collections, I had never actually been in the room before. Home to part of the Special Collections, and featuring warm wood paneling and tall windows that overlook Prospect Street, the Bruhn Room is used for a variety of purposes within the library, from classes and private study, to candidate presentations and meetings, to videotaped interviews with students and visiting scholars.

It’s a beautiful space, to be certain, but it’s difficult to capture all of this photographically. To capture all the elements of the room; from the paneling and windows, to the many books, objects, furniture and chandelier, I had to make many exposures that I could use to blend together to create one single, merged image. I shot a great many images, varying both the exposures (to pick up the detailing under the tables, in the bookcases, and on the ceiling), and the white balance (to correct for the overhead lights as well as the window light from outside). Although I did use a specialized lens (a 24mm tilt-shift lens, like the one in this video) to correct for perspective issues, I also had to make a final perspective correction as well.

The final image came out very strong, and ended up being published in The Manuscript Society News (vol 31, no. 4). Below you will see the progression of images as I compiled the final image, building up exposures and color balance. n.b.: You can click on any image to make it larger, and then click through the images to view one at a time.

Image 1: Overexposure to capture shadow detail under table, in bookcases.

Image 2: A darker exposure to bring out the richness in the wood paneling, floors and walls.


Image 3: A MUCH darker exposure, to bring out the details in the ceiling, washed out in the previous exposures.

Image 4: Image correction in Photoshop to correct the ceiling color and luminance but preserve the detail of the chandelier.


Image 5: An additional, darker layer, to bring in ONLY the detail of the overexposed window.

Image 6: An exposure the same as Image 5, but set to daylight white balance to correct the blue tone.


Image 7: A slight darkening on the ceiling, along the strips of light that outline the arch.

Image 8: A minor contrast adjustment on the same strip of ceiling, to show the detailing and sculptural quality of the ceiling.

The final image, with perspective adjustments to compensate for shooting at a wide angle in an enclosed interior space.

360 Degrees of Advent

December 7, 2012 by | Comments Off on 360 Degrees of Advent

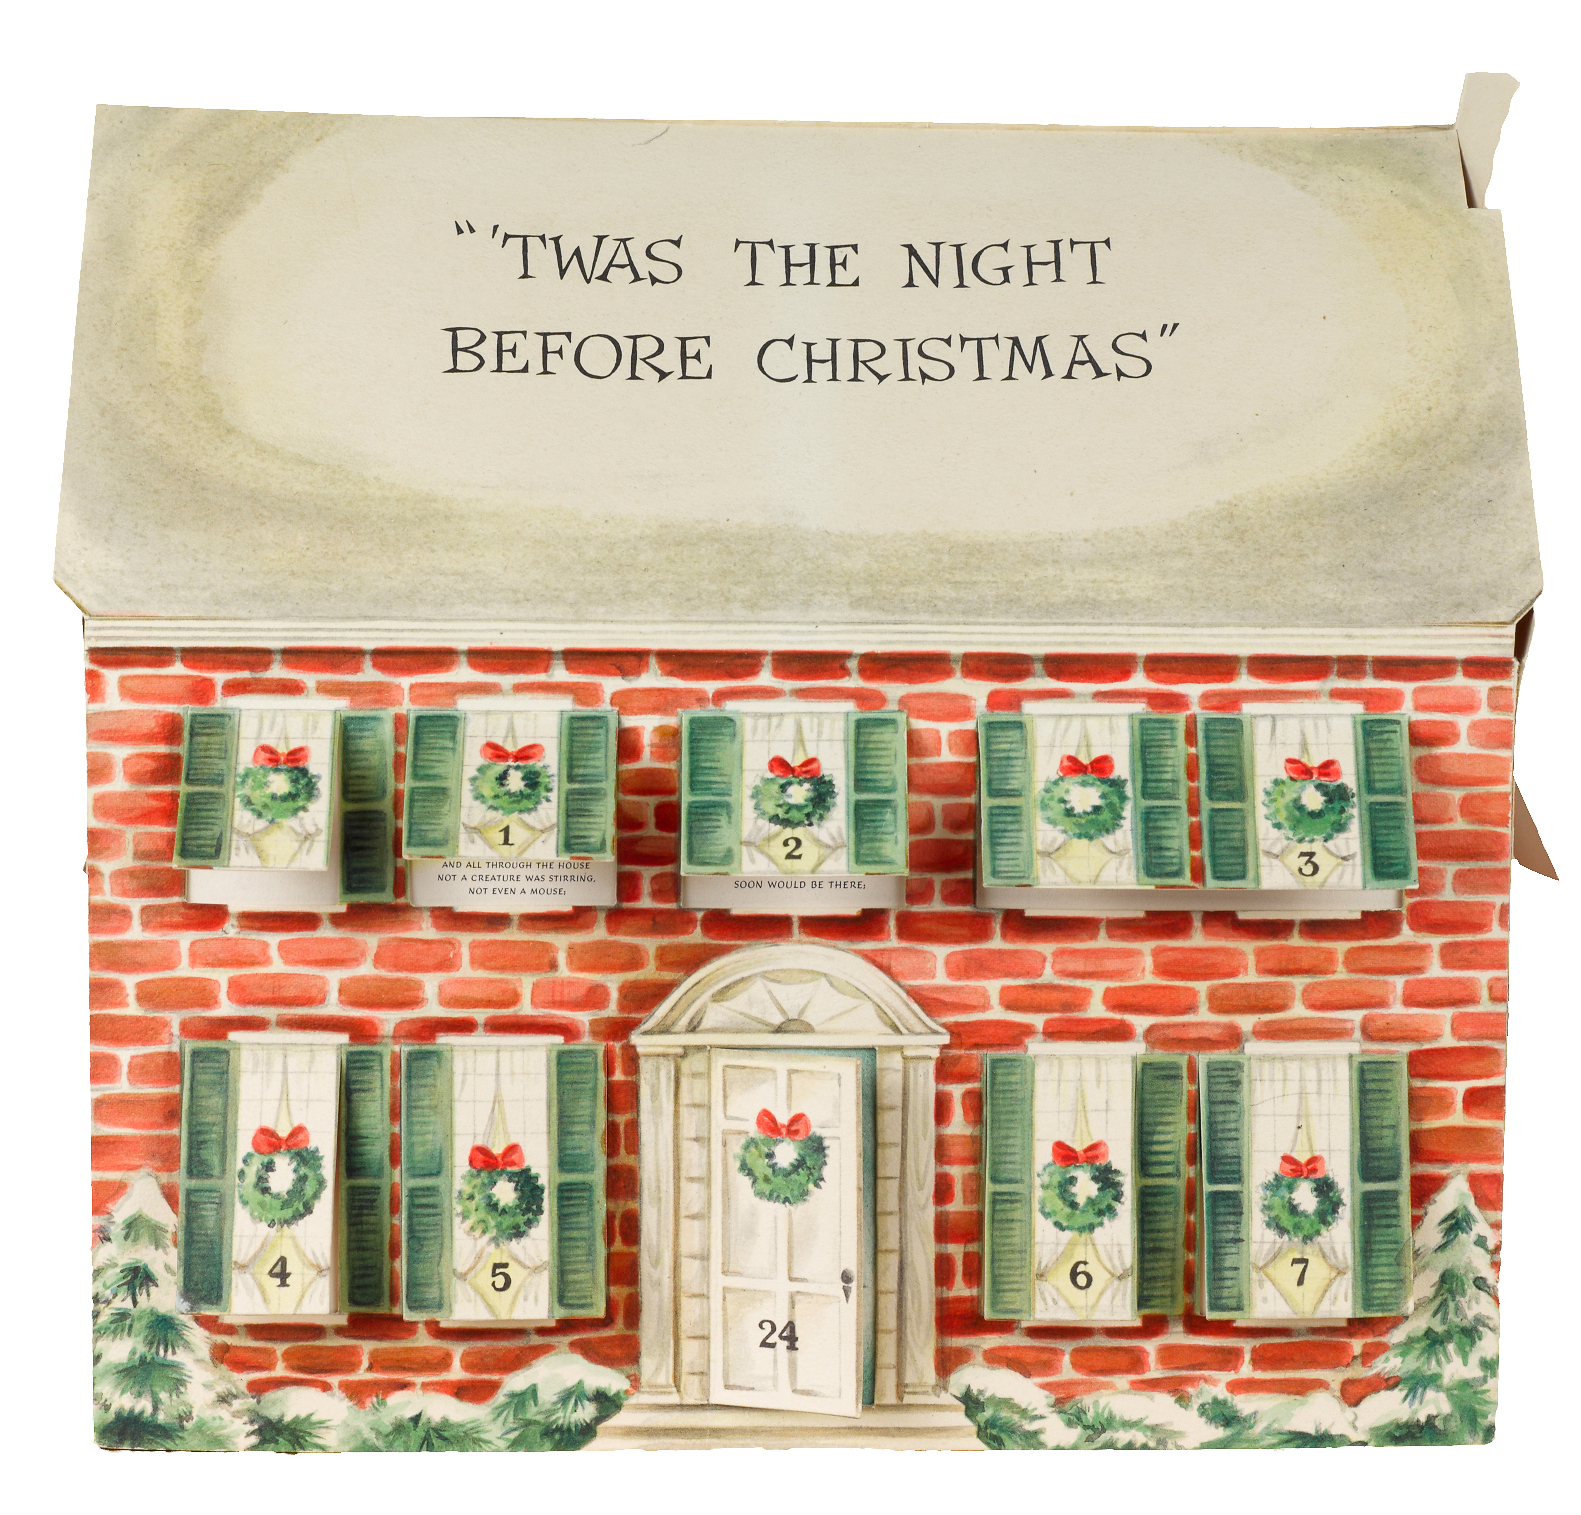
Advent Calendar – main view

Although I generally photograph books and flat documents, I occasionally have the opportunity to photograph three-dimensional objects. Depending on the type of object (this fold-up calendar, cuneiform tablets, a mummified crocodile!), I use different lighting setups and camera techniques. As I photograph these rare objects, I’ve become more and more interested in trying to represent them in as close to three dimensions as possible.

In lieu of a 3-D scanner, I have been experimenting with creating 360˚ rotating views of the objects. Done as sort of a proof-of-concept project, I photographed this Advent calendar, part of our Harris Broadsides Collection, using 360˚ rotating processes.

The process is actually pretty straightforward: you set up your camera and lights (all your settings and positioning must stay the same); and your object must be stable, and centered on a surface that can be rotated in small increments (as close to every 5˚ or every 10˚ as possible). While you can buy these devices, we took a more DIY route and made one using a lazy susan. To ensure that I rotated each shot only 10˚, my coworker generated an Adobe Illustrator file that had each 10˚ marked out exactly. While we have since started using a 5˚ model for better accuracy and more smooth rotations, it worked quite well:

The two different printouts I use when making 360˚ images.
Left: the printout used for this setup, with markings every 10˚, yielding 36 shots;
Right: our newer printout with markings every 5˚, yielding 72 shots.

I then used the Illustrator printout to mark off 10˚ on the lazy susan, centered the calendar on the surface, and began shooting. I lined up a spot on my shooting table which I could line up with each marking, and made my shots. I ended up with 36 images, and removed the background from each one.

Advent-10
The Advent calendar with background, showing its placement on the lazy susan and the 10˚ markings used in capture.
Advent 10-2
The same image, with the entire background masked out using clipping paths (just as in the “Coffee Pots and Clipping Paths” post).

While we can upload the images to the web and create interactive rotation using HTML5 & JavaScript, we can also produce movies that allow for a similar viewing experience. We also hope to work with our repository team to add zoom and angle-of-view functionality. Below is a sample movie:

It’s time to make the targets!

November 28, 2012 by | Comments Off on It’s time to make the targets!

It is standard practice here in Digital Production Services to include a reference target for tone and color reproduction in each digital image capture. The target is retained in the master TIFF file, and cropped out of the derivative file. Reference targets are used to achieve accurate color reproduction by providing visual references to known swatch color values directly within digital image captures. For our department’s newest digital camera-based system, we use an Image Science Associates target, which includes a focus/sampling-rate reference scale. For reflective (flatbed) scanning, FADGI Technical Guidelines for Digitizing Cultural Heritage Materials recommend that reference targets include a photographic gray scale, a color reference, and an accurate dimensional scale. The Kodak Q-13 is recommended for the gray scale and color reference. The Q-13 color reference includes a ruler along the top edge, but because its accuracy is debatable, we substitute with a dimensional scale generated in Adobe Illustrator.

Combined, streamlined targets can be created in-house by cutting and stacking the Q-13 strips. I create two versions, a standard 8” target and a 4” mini target, appropriate for postcard sized objects.

The Materials and tools used to create the combined targets are:

-Kodak Q-13 Color Separation Guide and Gray Scales
-Laminating Sheets
-Centimeter rules [printed]
-Scissors or Paper Cutter
-Exacto knife
-Ruler
-Bone folder

The technique I employ to create the 8” combined targets is to first cut two strips from each Q-13 color and greyscale target, and align them with the printed centimeter rule. Next, for purposes of color management, small marks should be made on particular greyscale patches. With an exacto knife, I notch the “A”, “M”, “B”, and 19 densities.

The mini-target is created by cutting down the full size targets. Include a subset of the greyscale patches (I use A, 1, 2; 6, M, 8; 15, B, 17; 19), and notch the greyscale “A”, “M”, “B”, and 19 densities.
Carefully align all Q-13 segments in the order shown, and pencil in the creation date on the back of each target.

Begin the final stage of assembly by cutting laminating sheets into 4” and 2” widths. Place the target strips and dimensional reference on top of the 4” strip. Place the 2” laminate strip on top of the dimensional reference, making sure to leave the Q-13 strips exposed. Use the bone folder to increase adhesion. By making diagonal cuts as shown, the remaining laminate material below the dimensional reference will serve as a “handle” and will allow the target to be positioned without touching the Q-13 densities directly.

Even with careful handling, reference targets become soiled over time and need to be replaced on a routine basis, especially if they are used regularly. The targets are also prone to fade, and therefore should be stored away from direct light sources.


Photography: Lindsay Elgin


From Caesar Monuments to Movie Posters

November 15, 2012 by | Comments Off on From Caesar Monuments to Movie Posters

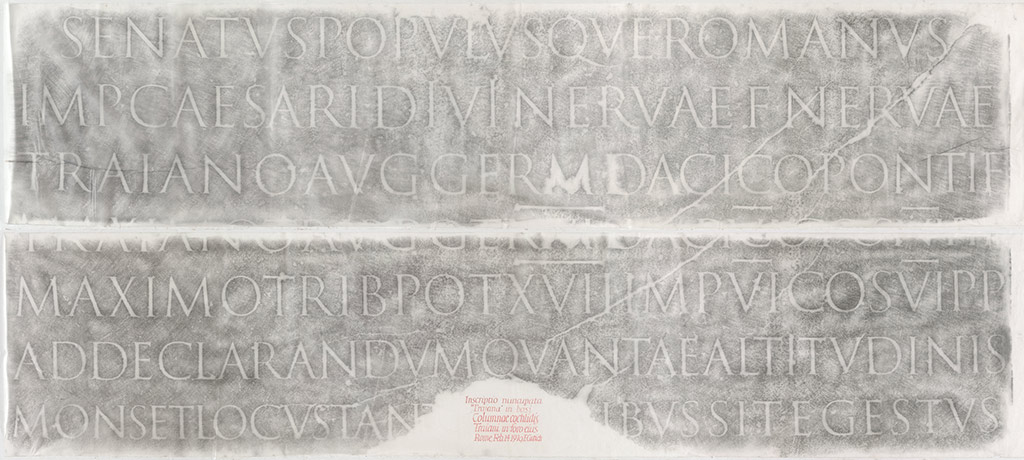
In 2007, the Library digitized two original, loaned rubbings of the inscription from Trajan’s Column (c. AD 113), to facilitate a reproduction request of the Rare Book School’s then Program Director Ryan L. Roth. The rubbings had been made by Edward Catich in 1970, and are now owned by Sheila Waters. Because of their size (two ~9-foot-wide thin-paper sheets), these were digitized in three overlapping shots per sheet, atop a white background, and then digitally merged together to create the final images.

Catich’s rubbing of Trajan’s Column’s inscription.

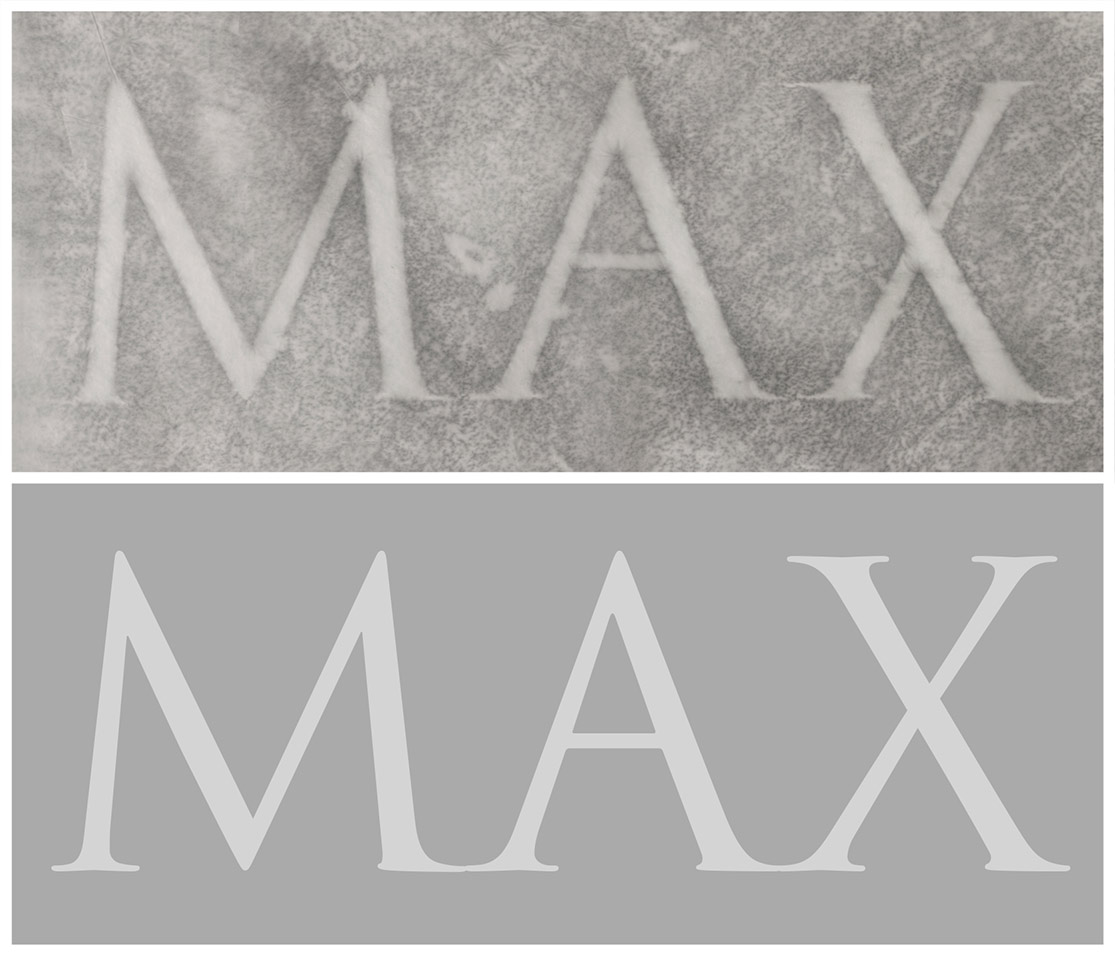
Catich’s research and speculation on Trajan’s Column’s lettering in turn influenced the creation of the now-popular digital font Trajan, first released as a PostScript font in 1989 (designed by Carol Twombly for Adobe Systems).

Top row: detail from Catich’s rubbing; bottom row: matching letters from the digital typeface.

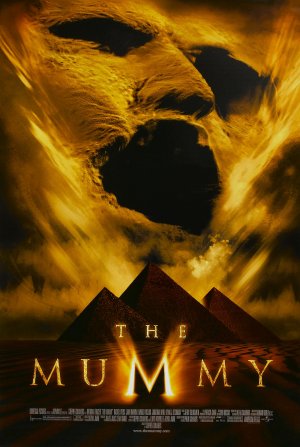
Ever since, starting in the early 1990s, and often as an affront to many graphic designers’ sensibilities, the Trajan font has been featured on an inordinately high percentage of American movie posters — even to the extent that the Roman lettering style is now associated with both Japanese Samurais and Egyptian mummies.

Trajan in The Last Samurai

Trajan in The Mummy

Sanskrit Friday

November 2, 2012 by | Comments Off on Sanskrit Friday

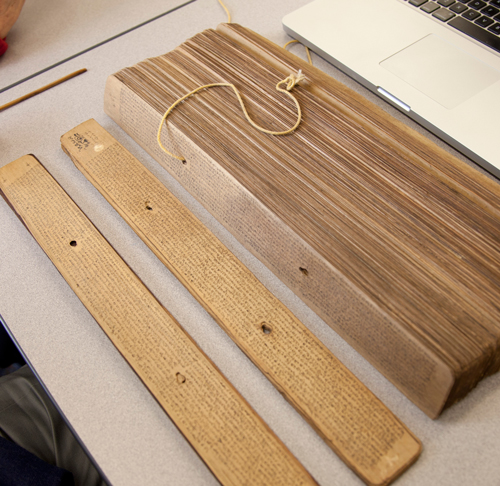
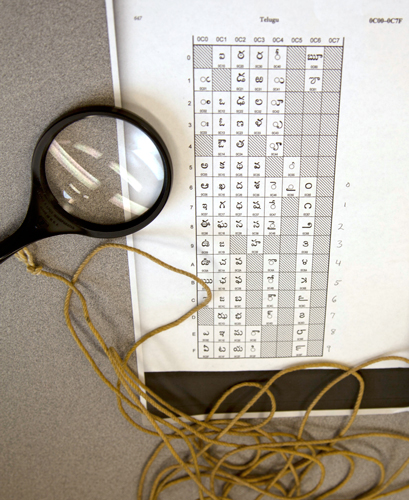
I was lucky today to work with two Sanskrit scholars, Peter Scharf and Susan Moore (both affiliated with the Sanskrit Library), to photograph some missing leaves in our palm leaf manuscripts digitization project. Palm leaf manuscripts are actually just what they sound like: they are manuscripts made from dried palm leaves, onto which scribes would etch the lettering and then apply dry ink, often black soot, over the etched letters. This practice is more than 2,000 years old, although with the need to recopy the leaves due to condition problems, many leaves we see today are much younger. The manuscripts are in sections, and each section is bound together with cord that runs through holes in each leaf. Our visiting scholars helped determine which leaves we needed to photograph (some of the manuscripts are in Sanskrit, some in Telugu), disassembled the manuscripts, and ensured that the leaves remained intact and in order.

Disassembling the manuscript

Reading the numerical system in the manuscript

Here’s an example of a typical palm leaf from these manuscripts (with color targets, which we include for our archival copies):

Some of these manuscripts are centuries old, and bear the marks of their age. The below manuscript shows that the leaf was partially eaten, presumably by a worm:

Another issue we run into with the manuscripts are leaves that have not been inked – when the leaf was etched by the scribe, but ink was never added to the etching. Here’s an example (at 100% magnification) of two separate palm leaves. One has been inked, while the other has only been etched. To be able to capture this properly, I had to tilt one of our lights at a very low angle to the manuscript, so that the raking light would fill the embossed letters and make them legible.

Although challenging, these manuscripts were fun to photograph. Part of what makes this work so interesting is the wide variety of materials we have, and the scholars, curators, and researchers that we get to work with.

Coffee Pots and Clipping Paths

October 25, 2012 by | Comments Off on Coffee Pots and Clipping Paths

In addition to photographing Special Collections materials for ongoing digital projects, or for patron requests for publication, Digital Production Services also digitizes items to be featured in library-produced promotional publications. In 2008, a coffee pot once owned by “Dr. Bob” (Rober Holbrook Smith), a founder of Alcoholics Anonymous, was taken off the shelf and set against a simple white background to be photographed.

The photograph itself is a straightforward shot — at the time, captured using the John Hay Library’s Nikon Digital SLR camera. However, to remove the background for a publication layout, “clipping paths” were created in Adobe Photoshop. Clipping paths are a useful way to mask-out the background within a scene — in other words, clipping paths can be used to visually define the edge of an irregularly-shaped object which does not conform to a standard rectangle-based crop.


Above, L–R: detail of coffee pot digital image; detail of image with background removed via pixel-based selection; detail of image showing vector-based clipping path overlaying pixel grid; clipping-path-masked image as placed in final layout.

There are pixel-based methods of creating masks in Photoshop, although clipping paths offer a unique solution, storing resolution-independent Bézier-curved (vector-based) edges alongside the pixel-based image grid, particularly useful for layered layout designs. Curves used for clipping paths are the same vector-based curves now becoming more widely supported by web browsers, as part of the Scalable Vector Graphics (SVG) specification and HTML5’s <canvas> tag scripting. (For an example of resolution-independent, vector-based curves implemented solely via web-based technologies, see this proof-of-concept site by a Google employee.)