Adding books, articles, videos, documents, and more to your reserves list
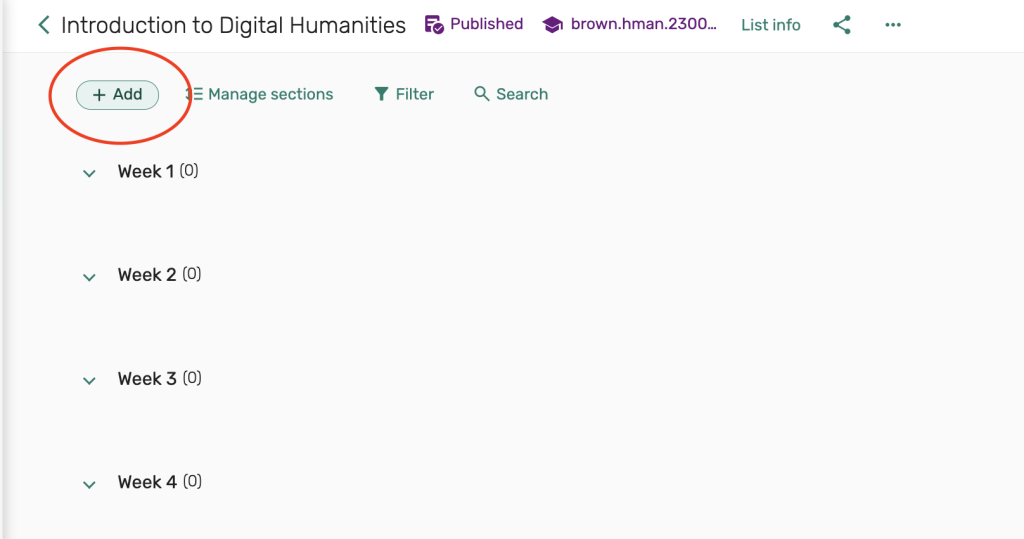
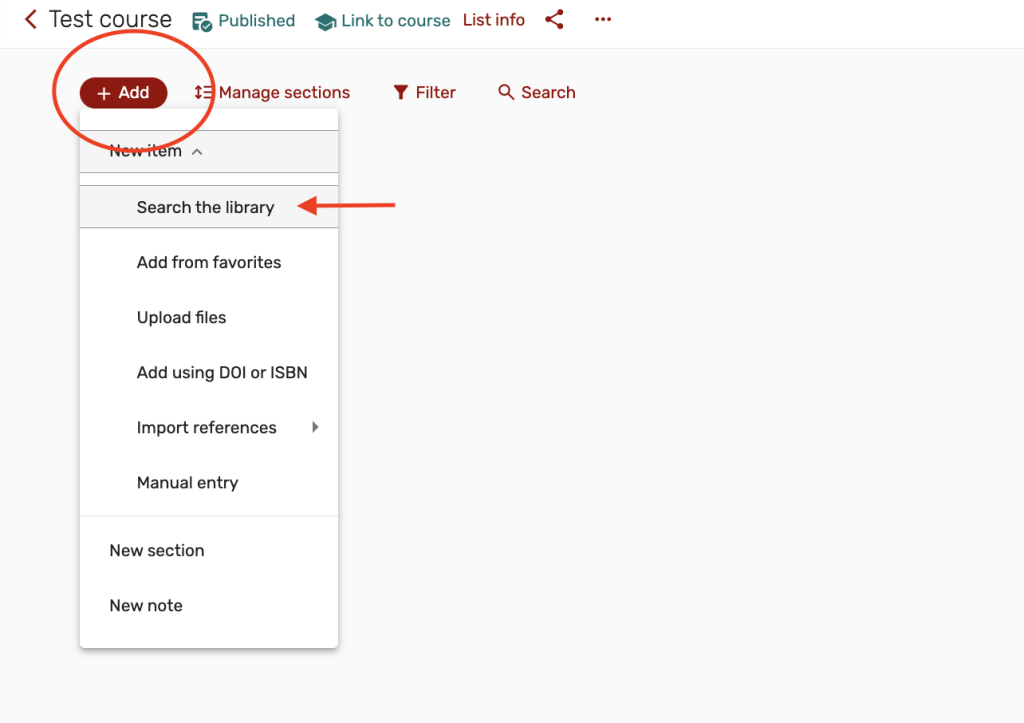
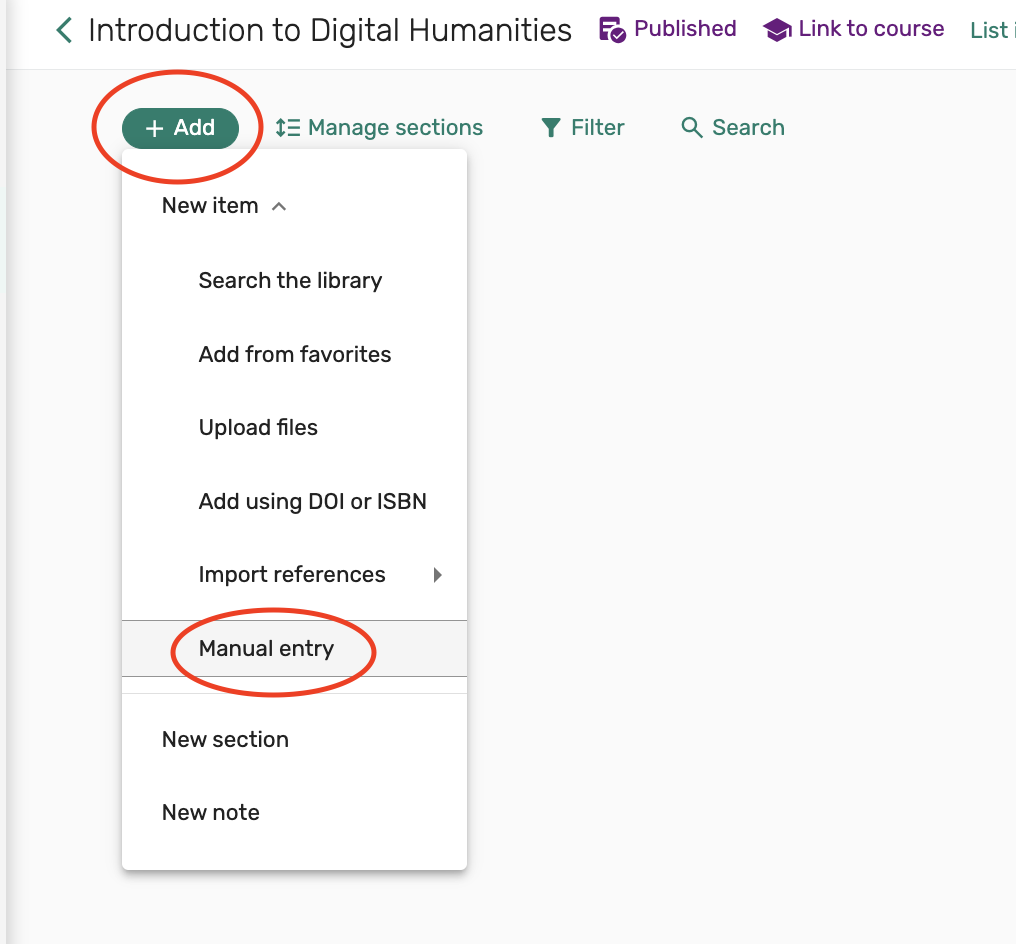
1. To add requests or resources to your reserves list, start by selecting the green Add button in the upper left corner of your reserves list.
2. Next, you’ll be presented with a few options for adding requests
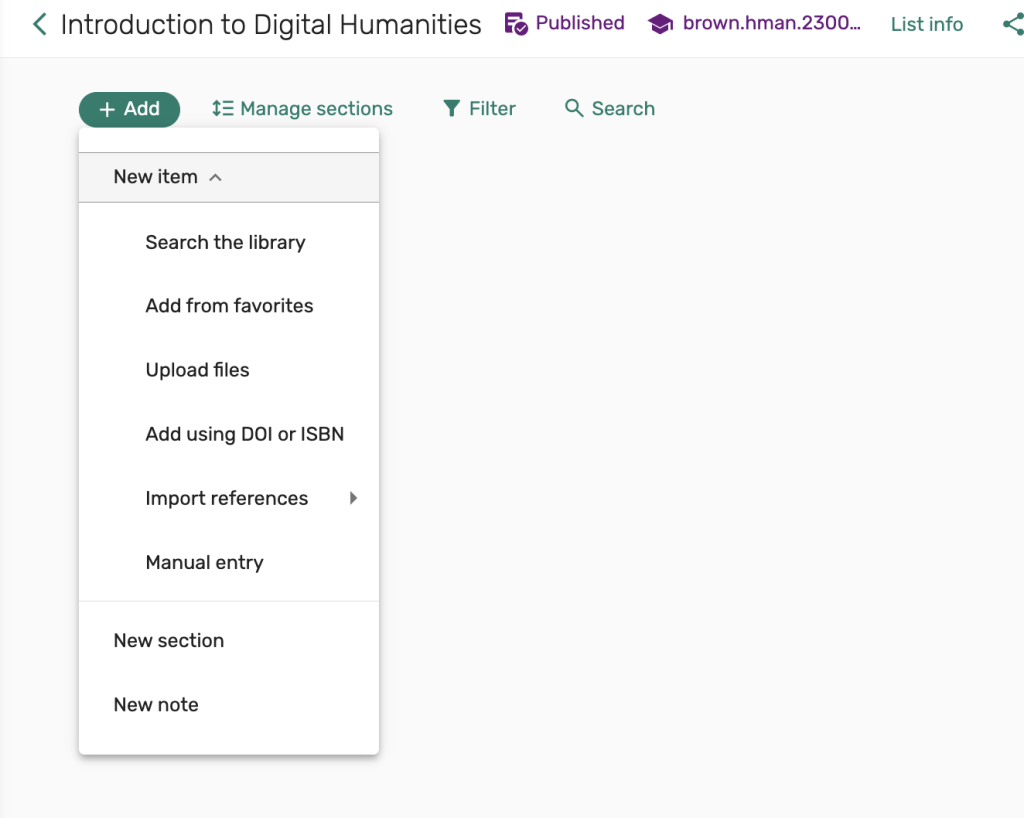
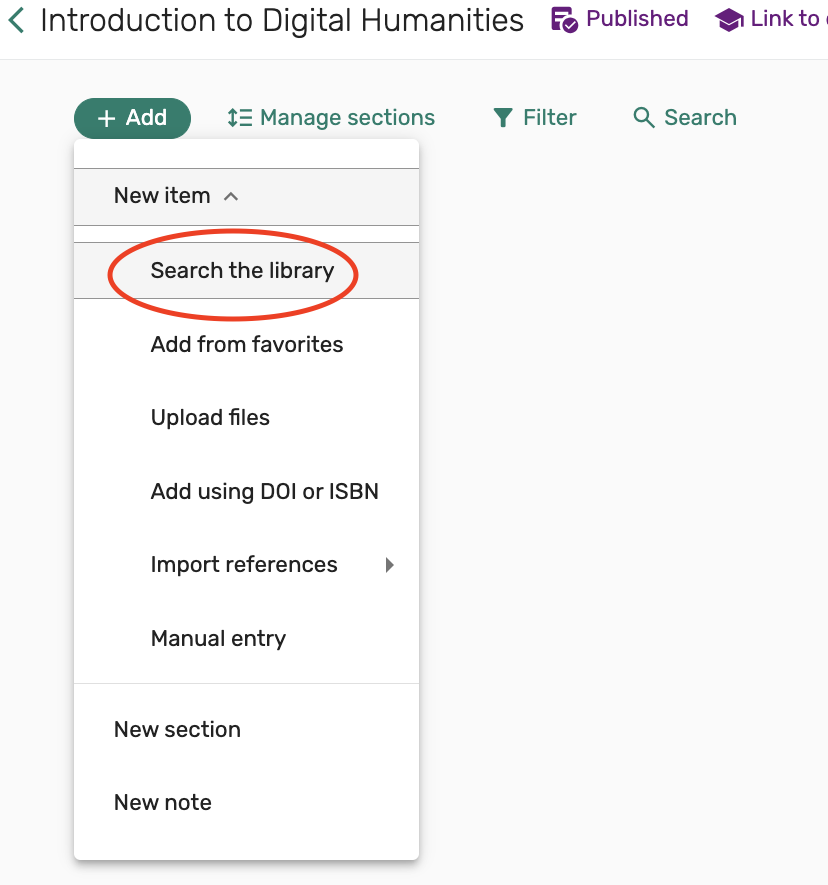
- Search the library– Use this option to search the library’s BruKnow catalog to place a request for an item that is held in the library’s current collection.
- Add from Favorites
- Upload files– Use this option to upload a PDF file from your computer. You may also add a brief citation when adding the request to your course.
- Add using DOI or ISBN– Enter a DOI or ISBN to search for and enter a request.
- Import references– Use this option to import requests from a file from a citation manager
- Manual entry– Use this option to add a manual citation for a request, such as, to place an article or excerpt scan request, to submit a purchase request, to add a weblink or to upload a PDF of a file.
To add requests using the Search the Library option
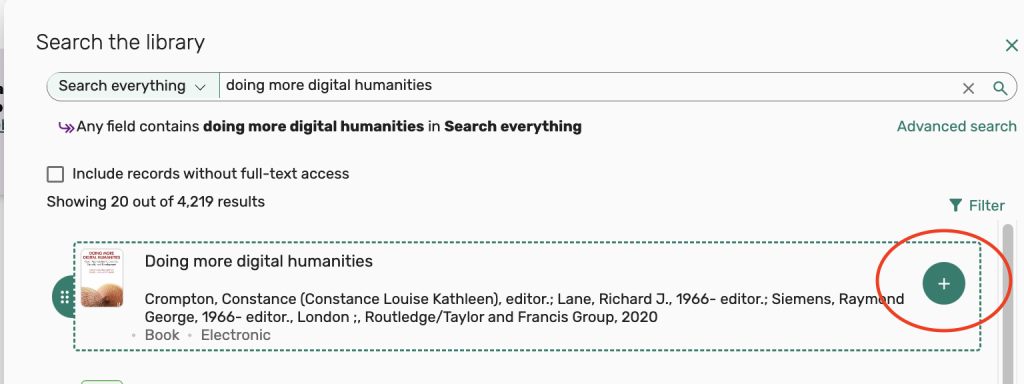
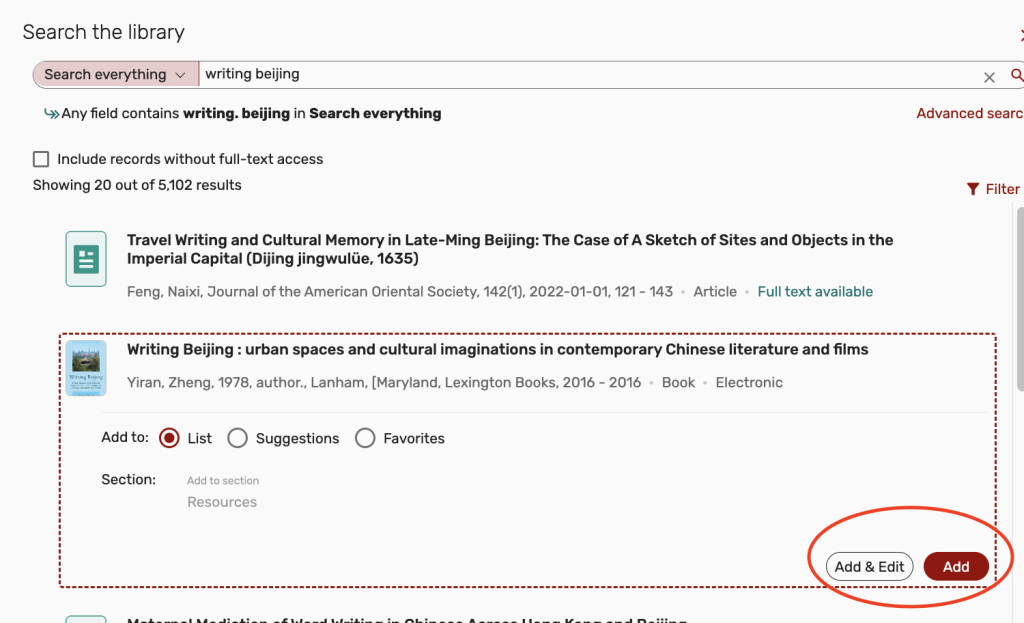
1. Start by entering the title of a book, article or keyword into the search criteria field and then select the magnifying glass to search. In this example, we are searching for the book, Doing more digital humanities.

2. All results for your title or keyword will appear in the search results along with the item availability.
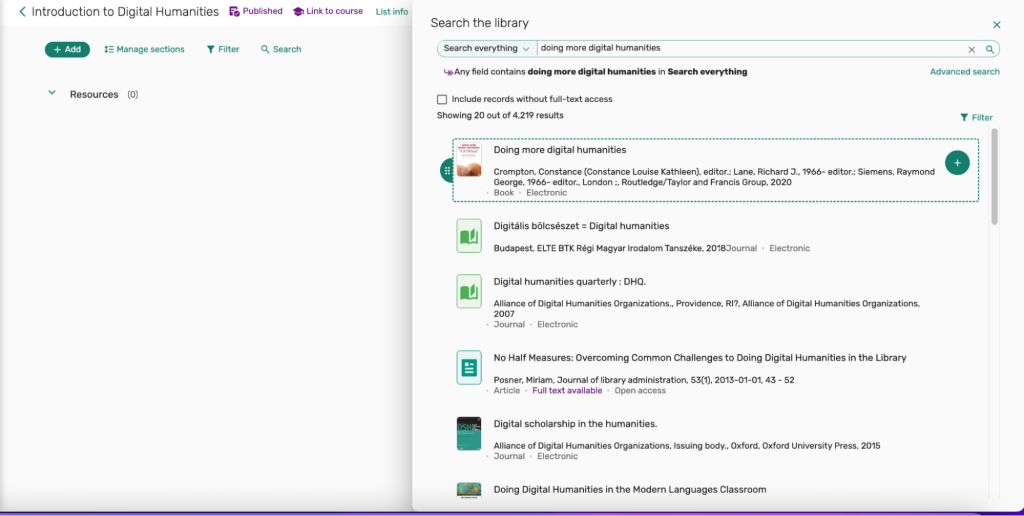
3. If you have a lot of search results, you can use the Filter option to limit your results by Resource Type or Availability.

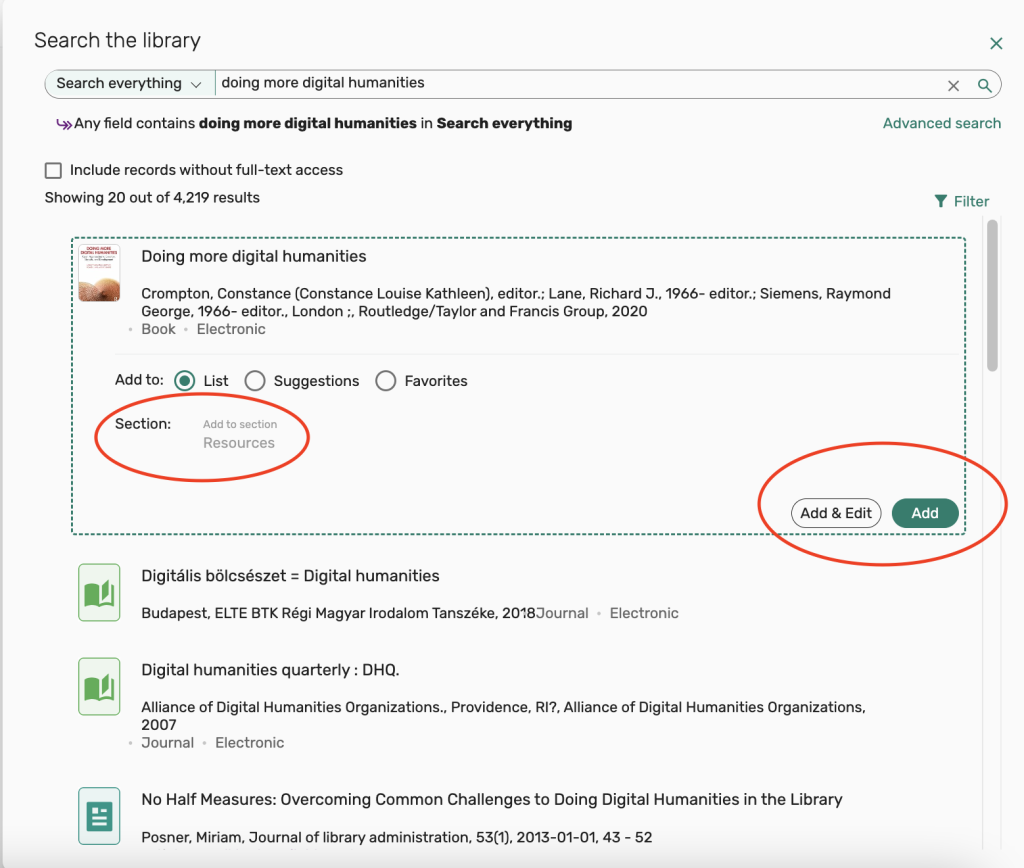
4. To add an item to your reserves list from your search results, you may hover your pointer/cursor over the item in your search results and look for a green button with a “+” to appear, or click on the item you would like to add and then select Add or Add & Edit from the list of options that appear in the citation to make further edits to your request.
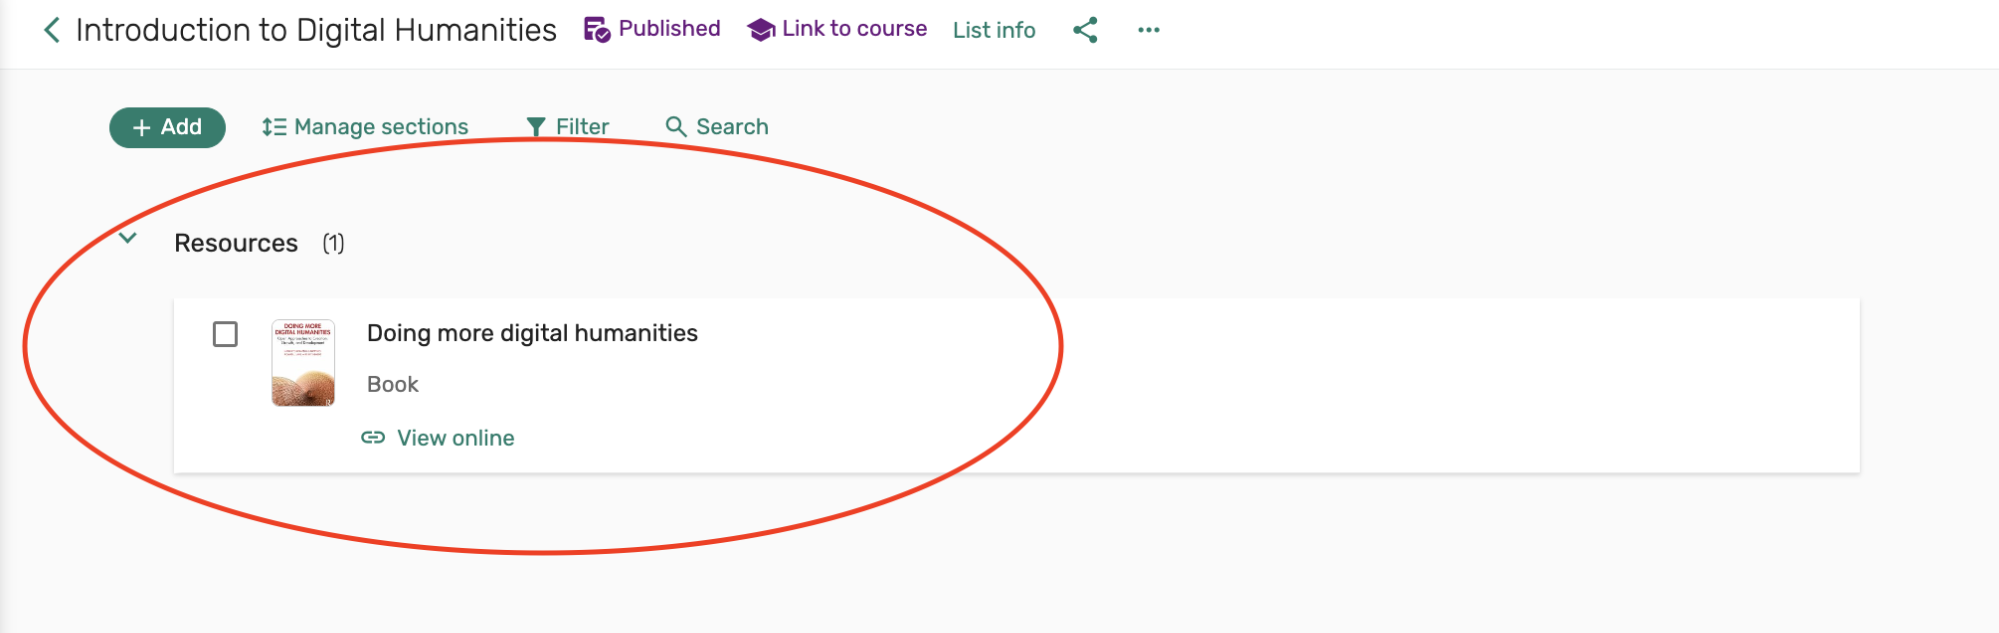
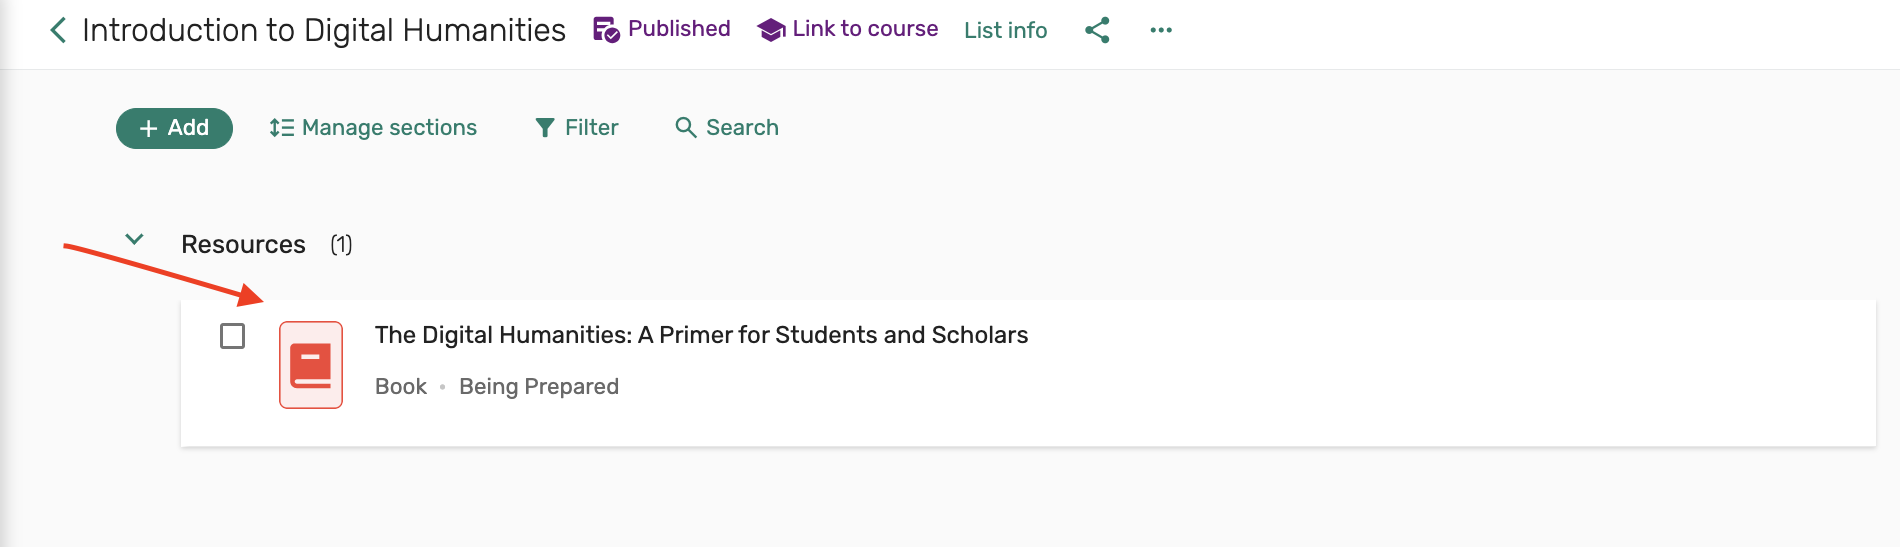
5. You’ll see that a request for the book, Doing more digital humanities, has now been added to the resource list.
If you are using a template with multiple sections, you may also drag and drop a resource from your search results into a given week or section.
6. Continue adding requests until you have completed your list of course reserves.
Our system is currently configured to automatically publish your list so students can view it, and also automatically inform the library that you have submitted a reserves list for processing.
Using the Manual Entry option to add requests
- Add a manual citation for a request.
- To place an article or excerpt scan request.
- To submit a purchase request,
- To add a weblink to something that’s online,
- To upload a PDF of a file
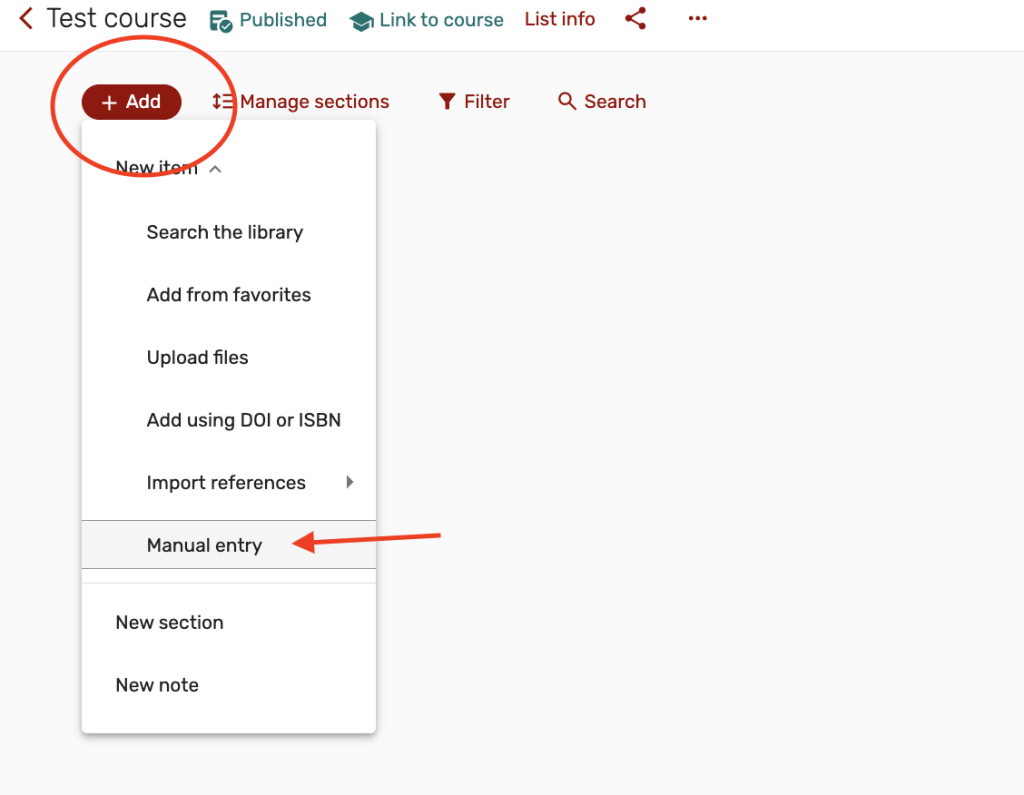
1. To use the Manual entry option, select Add from the top left of your reading list and select Manual entry from the options displayed.

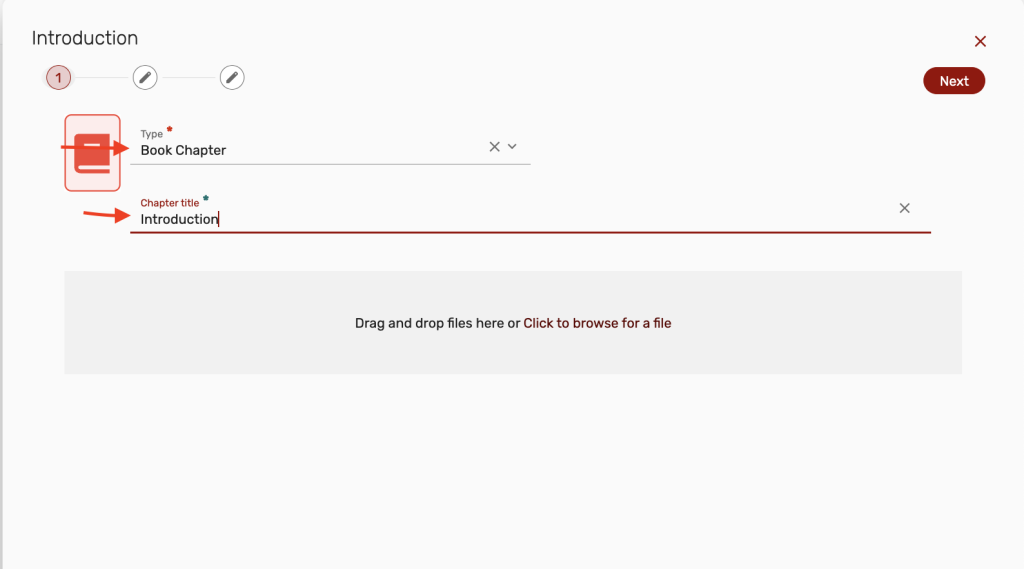
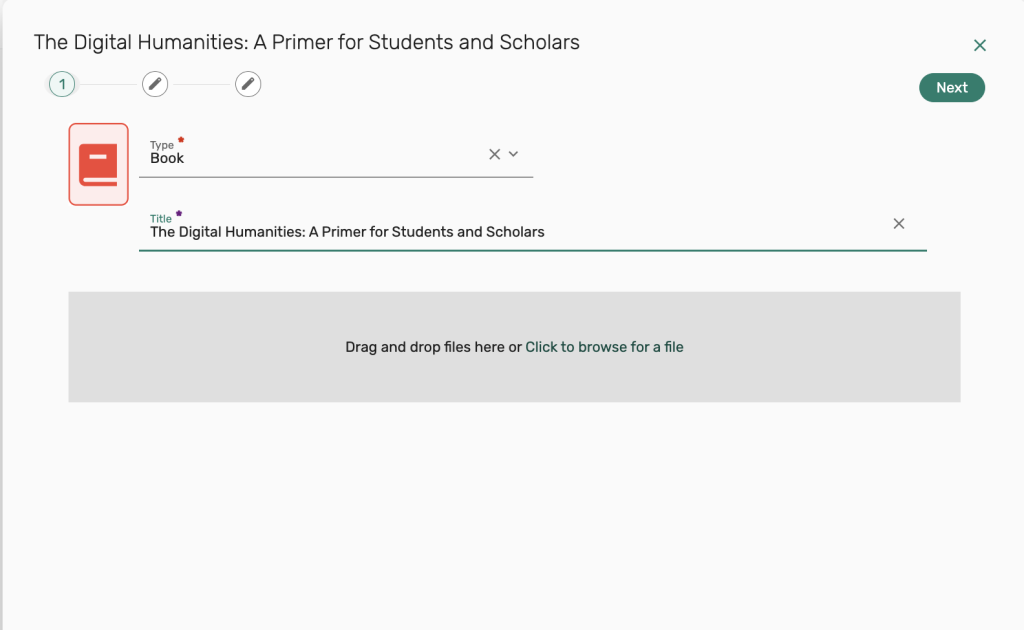
2. To add requests using the Manual entry option, enter the title of the item or reading into the Title field and enter the type of item you are requesting into the Type field. Select Next to continue adding your citation.

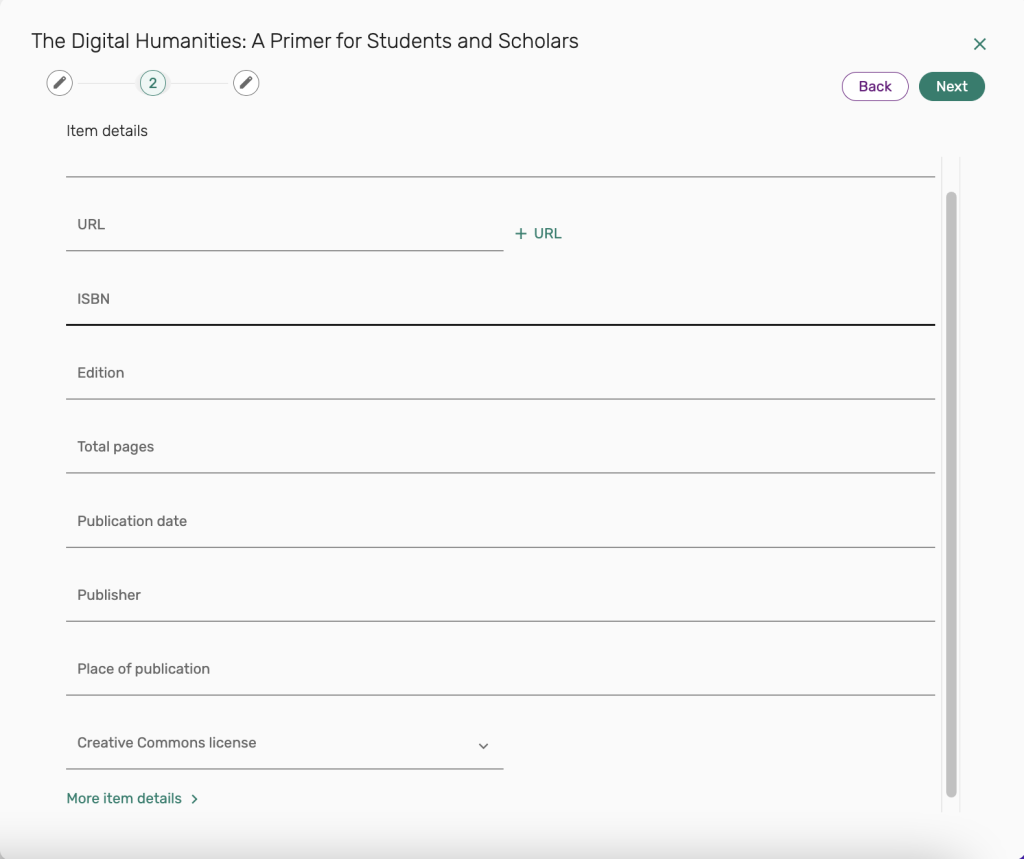
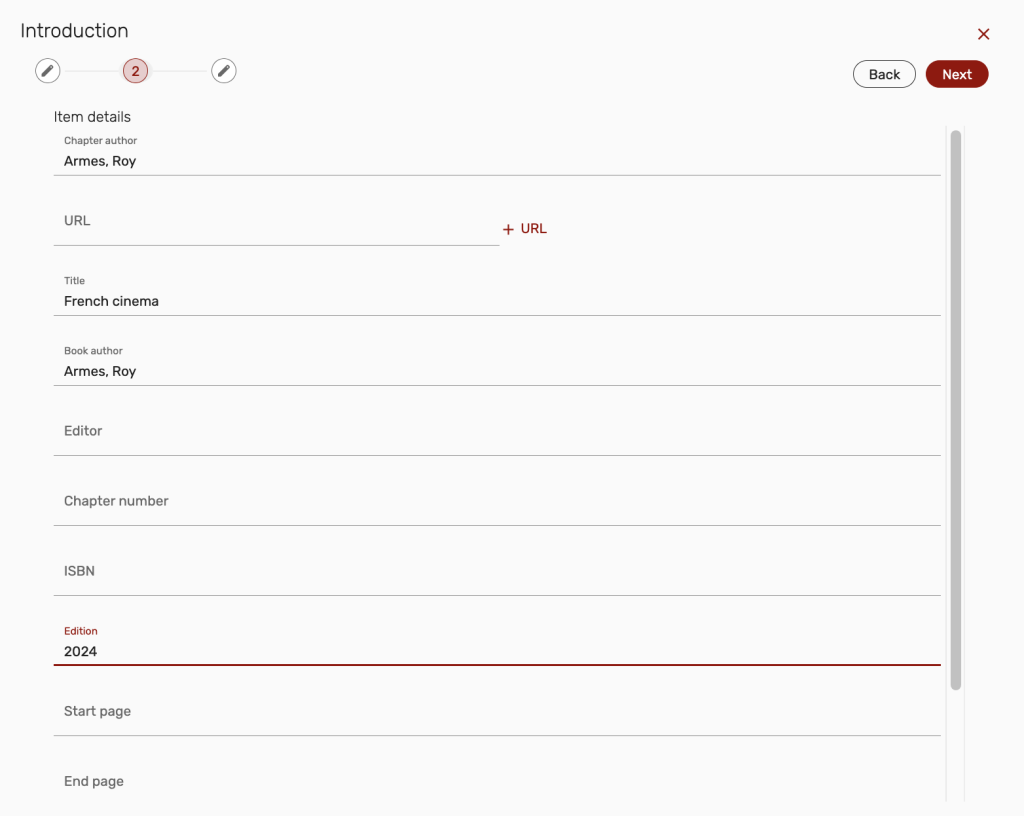
3. Next you’ll be presented with additional citation fields for your request. Only the Title and Type fields are required, so you may choose to continue adding citation information, or select Next to continue.
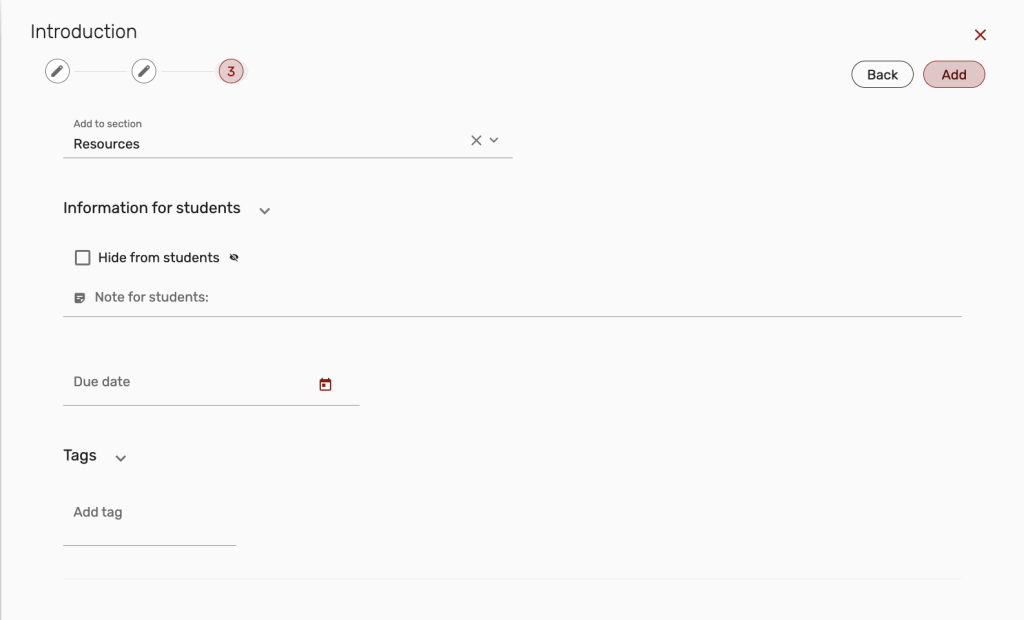
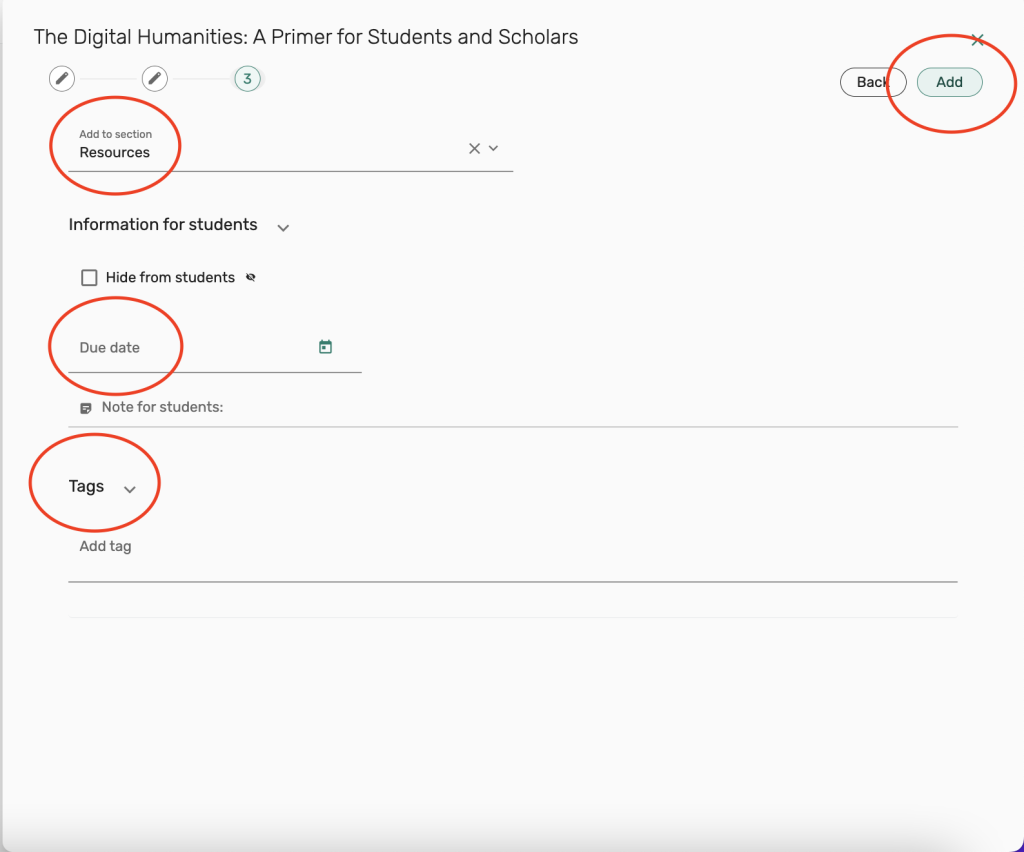
4. On the next page you’ll have some options for what section you would like to add the request to. If you are using multiple sections in your list, you can select a different section from the Add to section dropdown menu.
You may also choose to add a reading due date for the assignment in the Due date field, or add a Tag from the Tags section to let your students know if the reading is Essential or Optional.
After making your selections, select the Add button on the upper right to add the request to your reserves list.
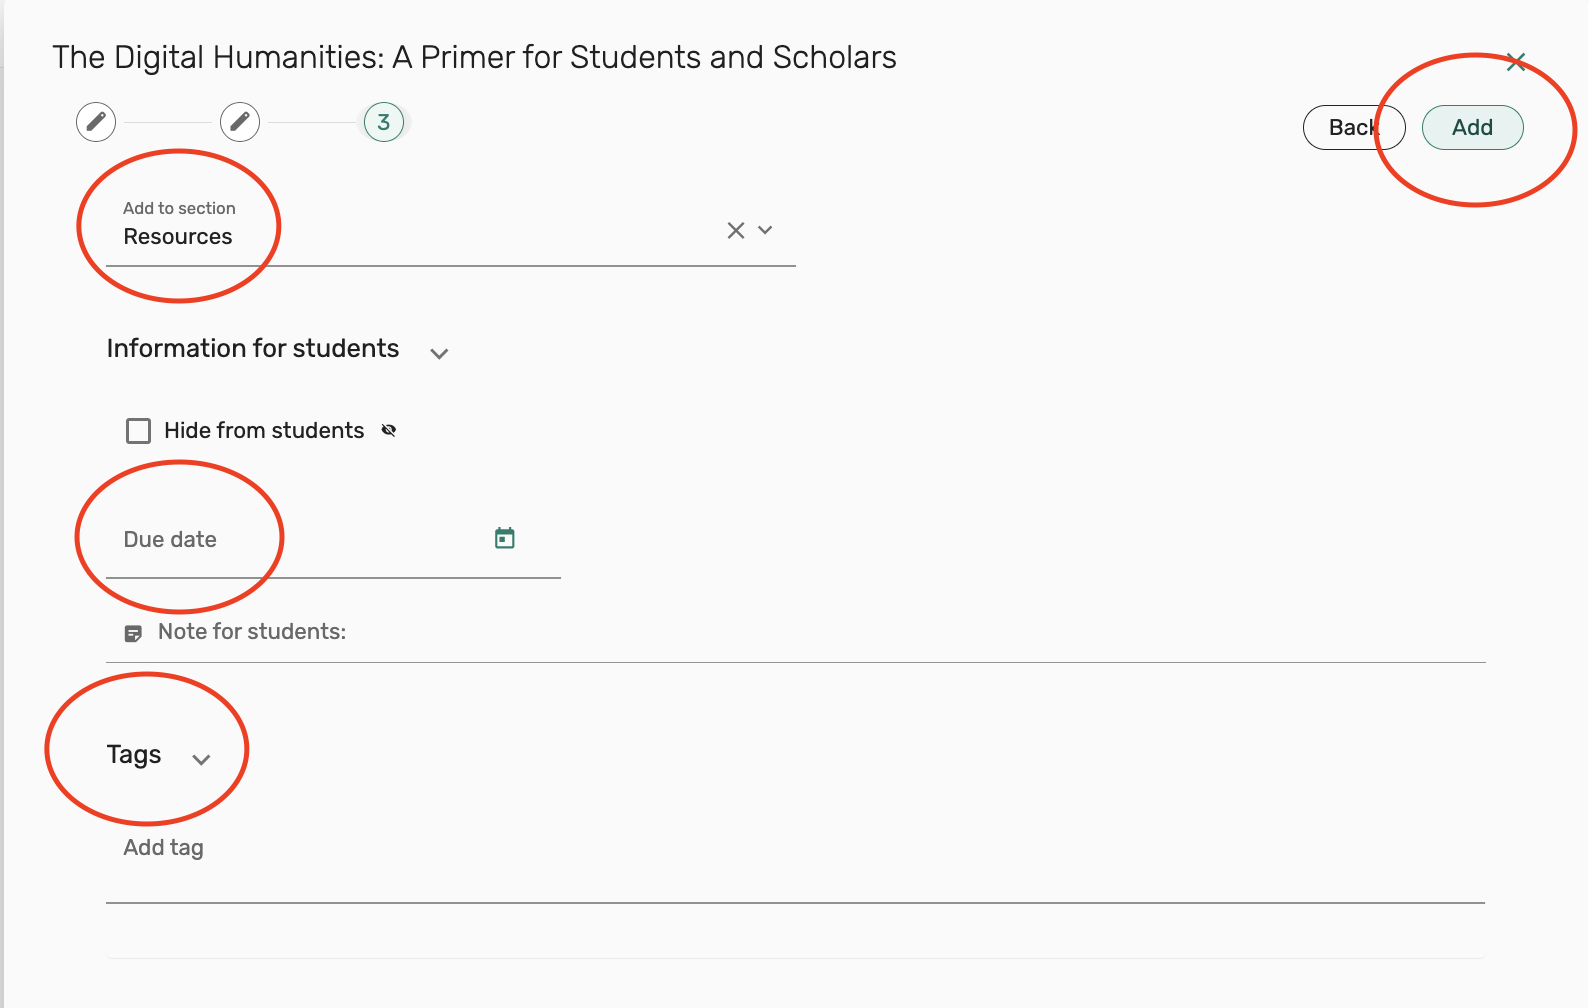
5. You’ll see that a request for the book, The Digital Humanities: A Primer for Students and Scholars, has now been added to the list of resources.
6. Continue adding requests until you have completed your list of course reserves.
Our system is currently configured to automatically publish your list so students can view it, and also automatically inform the library that you have submitted a reserves list for processing.
How to submit an article or excerpt scan request
Submitting a request to have an article or book excerpt scanned and added to your reserves list can be done by either using the Search the library option and searching for the item title, modifying it to an Article or Book chapter request, or by using the option for Manual entry and entering a citation for the item and what needs to be scanned.
Using the Search the library option
Use this option to request a scan from an item that is currently part of the library’s collection.
1. Go to Add from the top left of your reading list and select Search the library.
2. Enter the title of the item that you are requesting a scan from. Locate the item from your search results, and select Add & Edit.
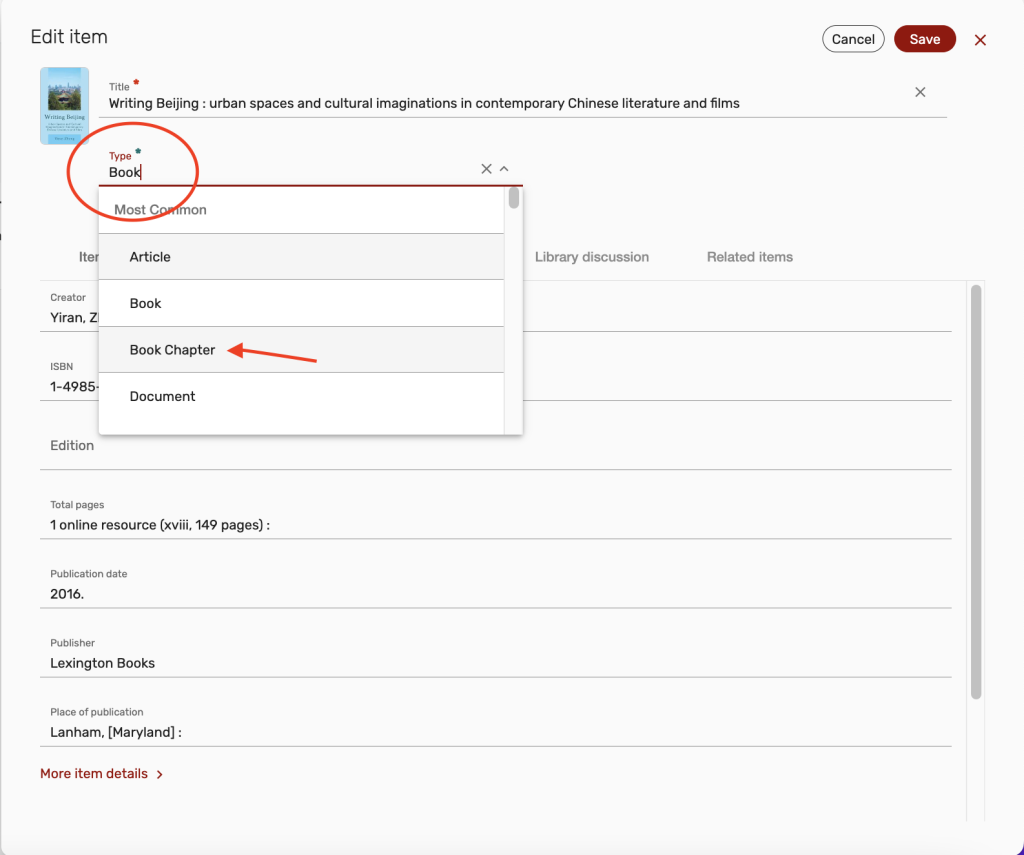
3. Edit the item citation to change the item Type being requested from Book to Book Chapter.
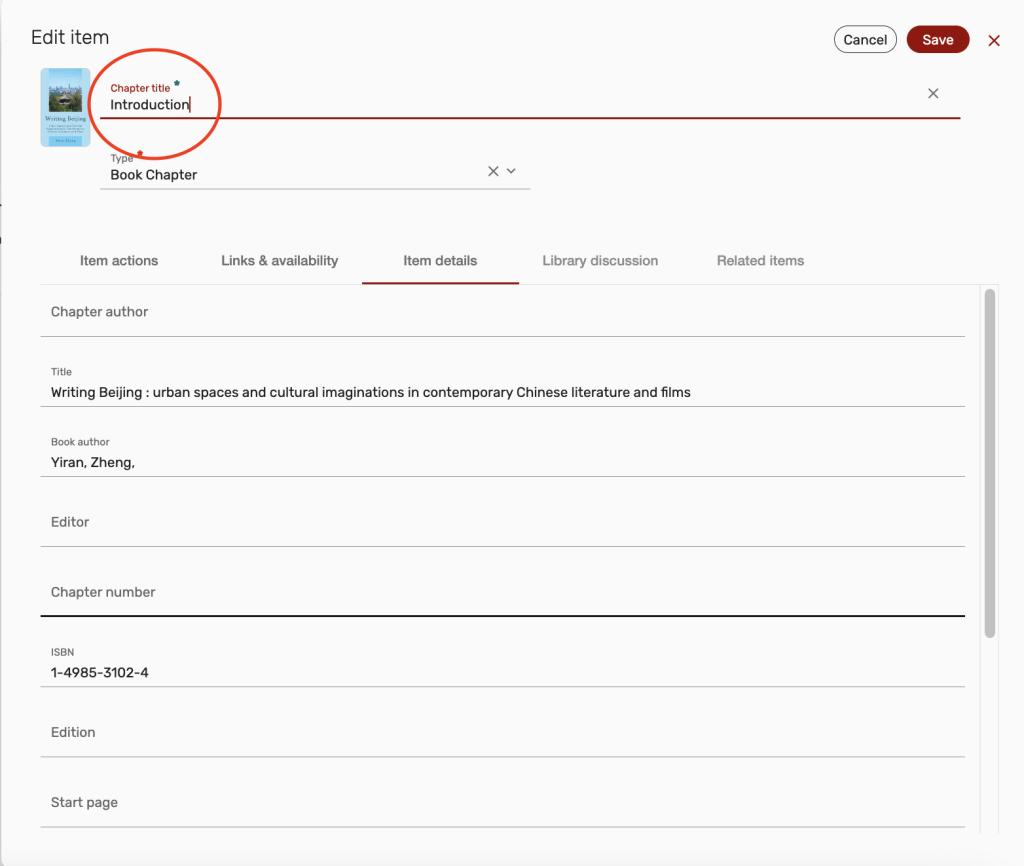
4. After changing the item type, you’ll see that the Book title field has now changed to a Chapter title field. Enter the page range or chapter title that you would like scanned and click Save in the upper right corner of the citation.
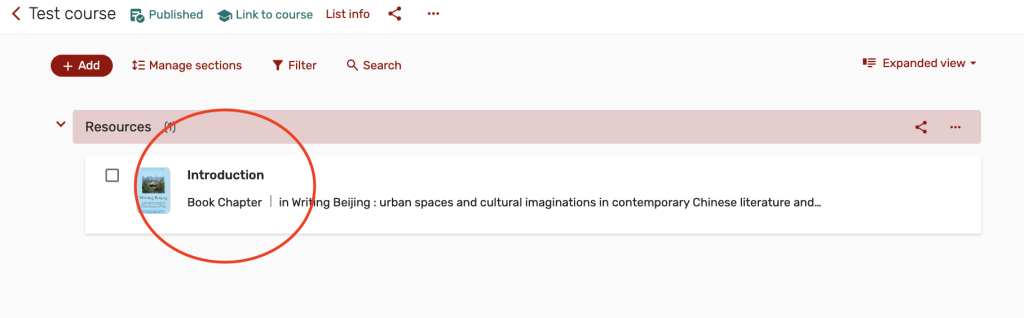
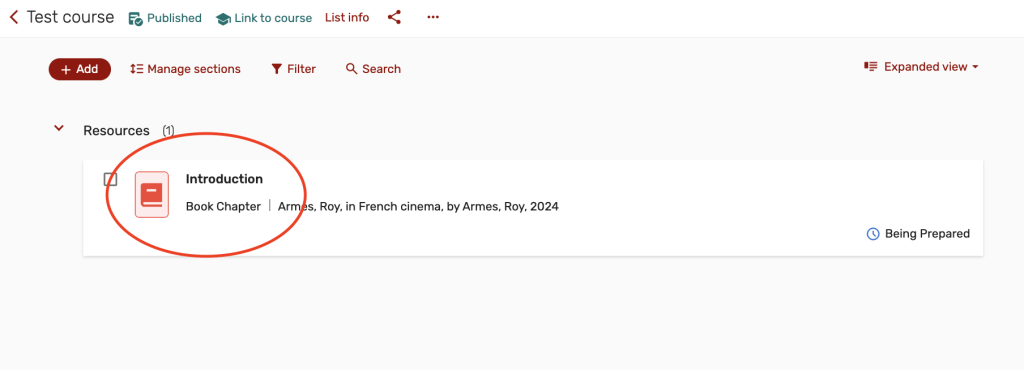
5. Your request has successfully been submitted to receive an excerpt scan from the item, and your request will appear in your list as a Book Chapter request.
Using Manual entry to submit a request
The Manual entry option can be used to submit requests for items that are not currently part of the library’s collection. These items can be items that you own a personal copy of that you will supply the library for scanning, or items that the library will need to purchase and scan.
1. To use the Manual entry option to submit an article or excerpt request, select Add from the top left of your reading list and select Manual entry from the options displayed.
2. Change the Type of item to either Book Chapter or Article from the dropdown list. In the field below, the Title or Chapter title field, enter the page range or chapter title of what you would like scanned. Select Next to continue.
3. Next you’ll be presented with additional citation fields for your request. Only the Title and Type fields are required, so you may choose to continue adding additional citation information, or select Next to continue.
4. On the next page you’ll have some options for what section you would like to add the request to. If you are using multiple sections in your list, you can select a different section from the Add to section dropdown menu.
You may also choose to add a reading due date for the assignment in the Due date field, or add a Tag from the Tags section to let your students know if the reading is Essential or Optional.
After making your selections, select the Add button on the upper right to add the request to your reserves list.
5. Your request has successfully been submitted to receive an excerpt scan from the item, and your request will appear in your list as a Book Chapter request.
Submit a purchase request from your reserves list
Items that are needed to be placed on course reserve which are not currently part of the library’s collection can be requested from a reserves list by following the steps below using the Manual entry option.
To enter and submit a citation for an item that needs to be purchased.
1. To enter and submit a citation for an item that needs to be purchased, use the Manual entry option, by selecting Add from the top left of your reading list and selecting Manual entry from the options displayed.
2. To add requests using the Manual entry option, enter the title of the item or reading into the Title field and enter the type of item you are requesting into the Type field. Select Next to continue adding your citation.
Next you’ll be presented with additional citation fields for your request. Only the Title and Type fields are required, so you may choose to continue adding citation information, or select Next to continue.

4. On the next page you’ll have some options for what section you would like to add the request to. If you are using multiple sections in your list, you can select a different section from the Add to section dropdown menu.
You may also choose to add a reading due date for the assignment in the Due date field, or add a Tag from the Tags section to let your students know if the reading is Essential or Optional.
After making your selections, select the Add button on the upper right to add the request to your reserves list.
5. You’ll see that a request for the book, The Digital Humanities: A Primer for Students and Scholars, has now been added to the list of resources.

6. Continue adding any other purchase requests until you have completed your list of course reserves. Our reserves team will review your request, and work on acquiring the item for our collection, and placing a copy of the item on reserve for your course.
Our team will also reach out with any questions about your request, or notify you of any issues with supplying the item for your course.
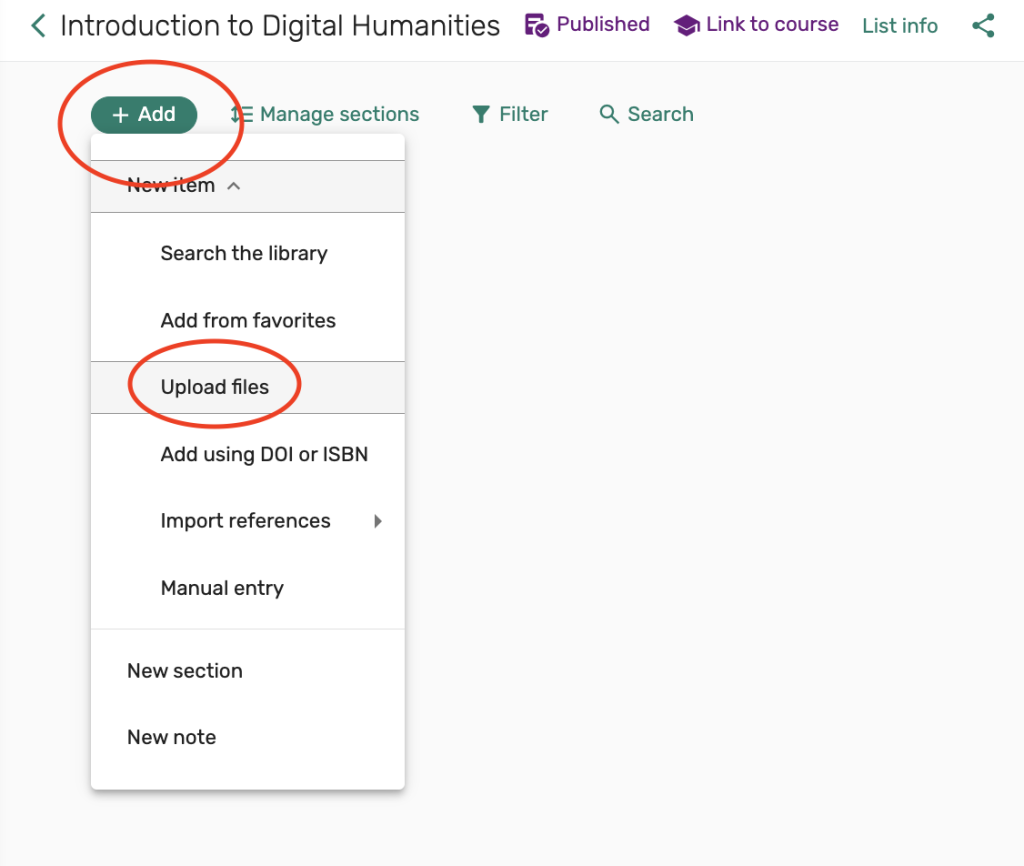
Using Upload files to add requests
1. To use this option, go to Add, and then select Upload files to upload a PDF file.
2. You can drag the file from your computer into the shaded area, or you can click on Click to browse for a file, to search your computer for a file and upload it.
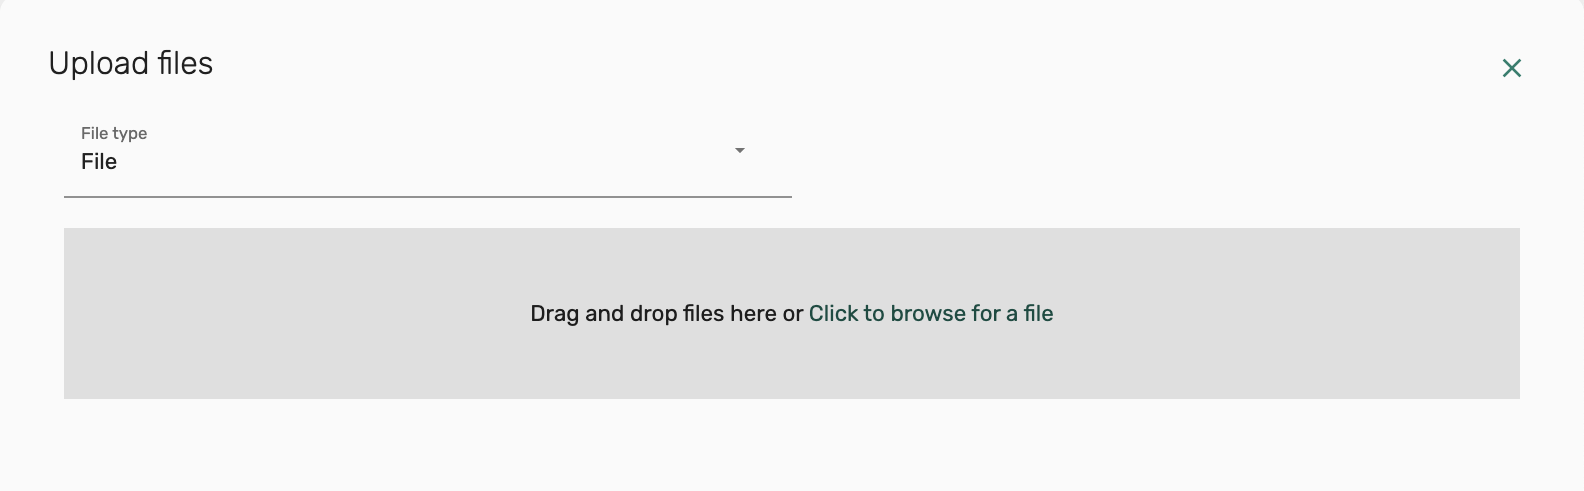
3. After selecting your file from your computer or dragging your file into the shaded area, enter the title of the reading into the Title field. You’ll see your uploaded file directly under this.
Select the appropriate Copyright information/ Fair Use question for the file that you are uploading and then select Next to continue.

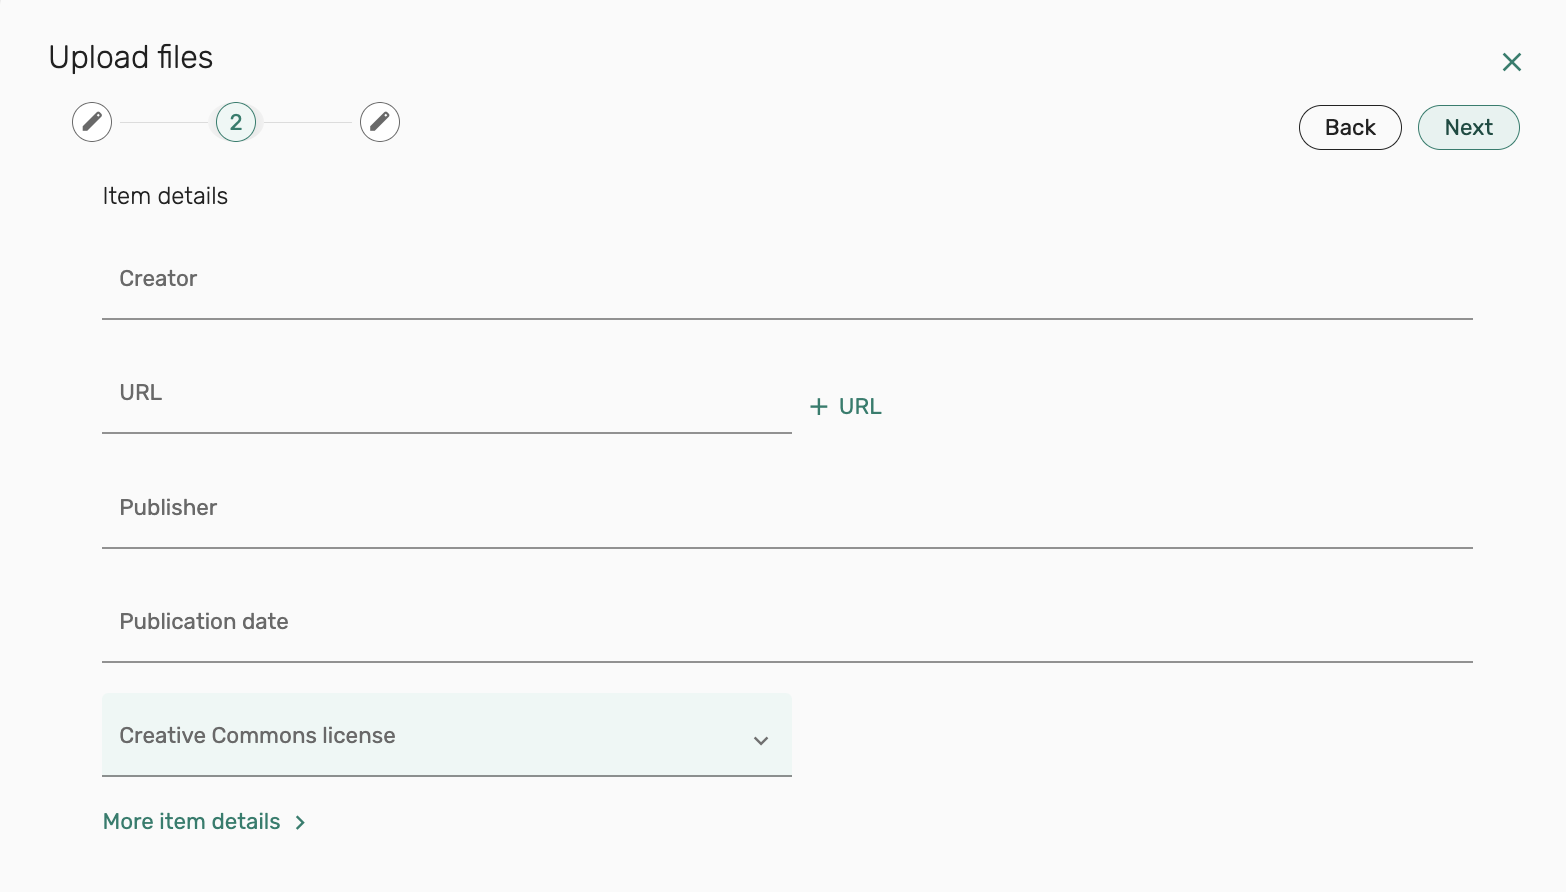
4. On the next screen you can continue adding citation information for your file. Select Next to continue.
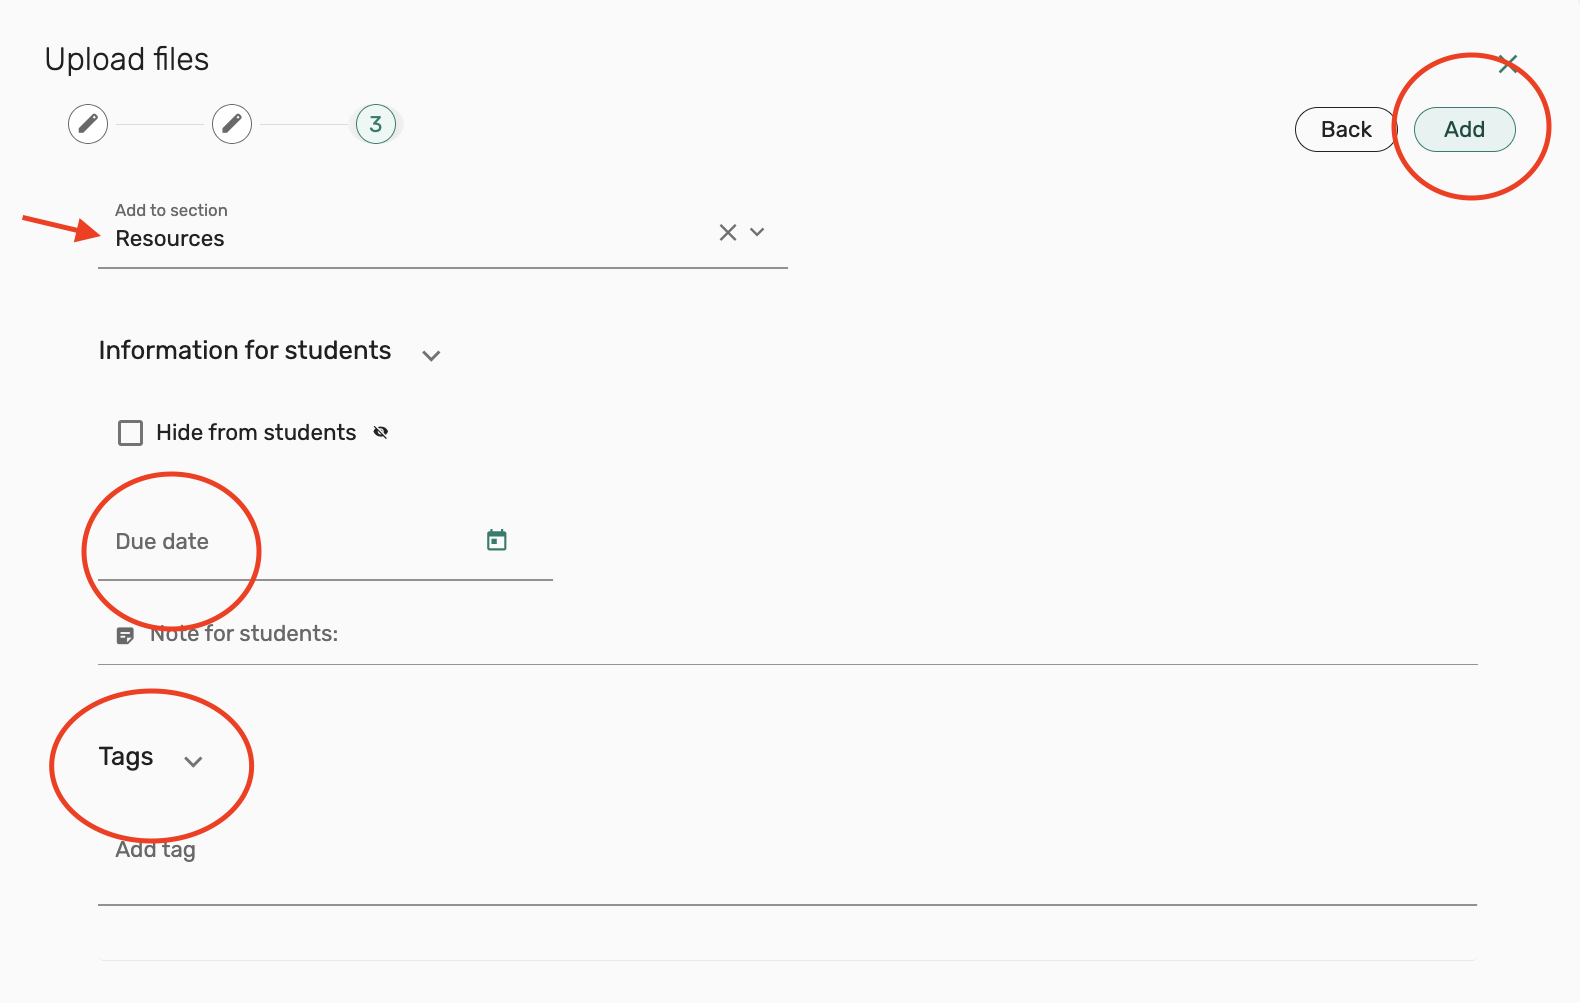
5. On the next page you’ll have some options for what section you would like to add the request to. If you are using multiple sections in your list, you can select a different section from the Add to section dropdown menu.
You may also choose to add a reading due date for the assignment in the Due date field, or add a Tag from the Tags section to let your students know if the reading is Essential or Optional.
After making your selections, select the Add button on the upper right to add the request to your reserves list.
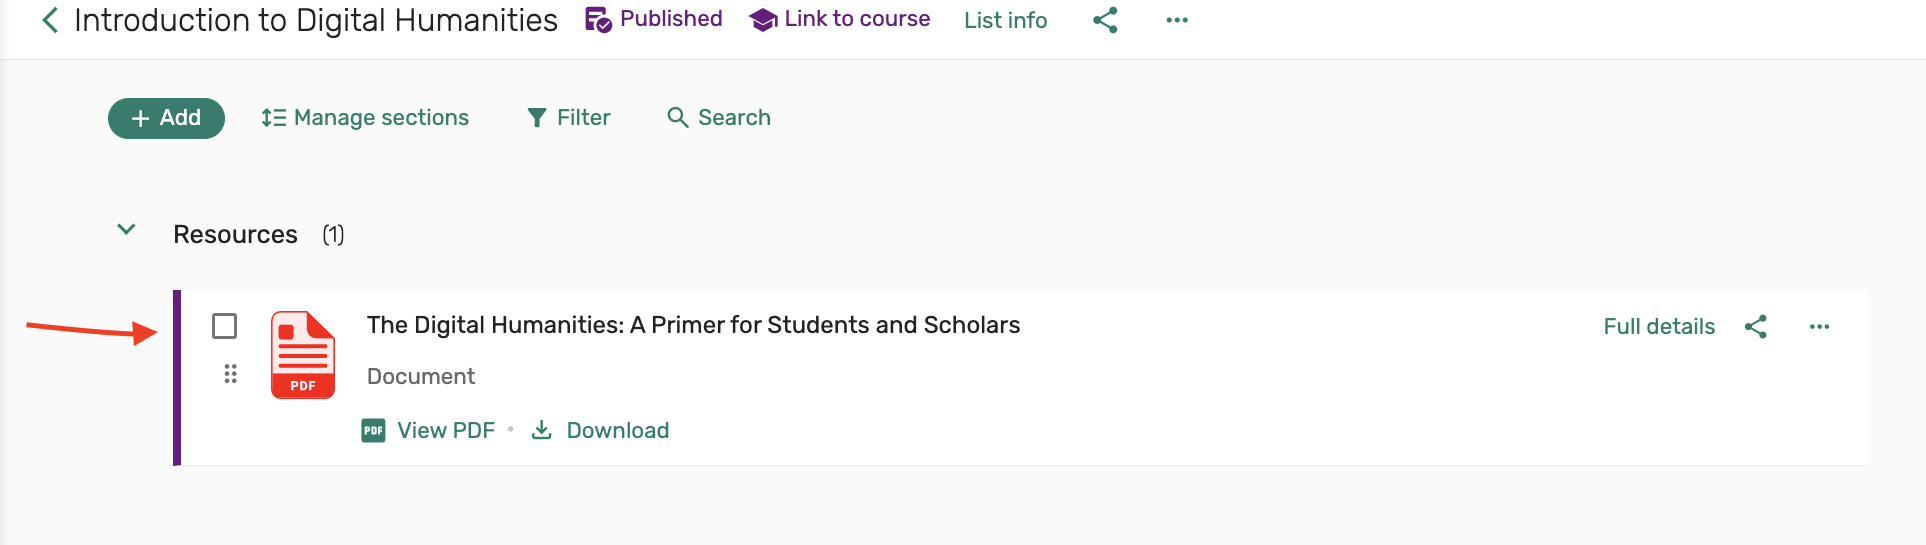
6. Next, you’ll see that a citation for the introduction from the book, The Digital Humanities: A Primer for Students and Scholars, has now been added to the list of resources with a link to view the reading.
7. Repeat these steps to add additional files to your reserves list.
Adding Film Requests
Request films
To request a film be placed on reserve for your course, the process is the same as requesting any other item to be placed on reserve. Please follow the instructions on how to add a reserves request to request that a film be placed on reserve.
After your film requests have been submitted, our reserves team will review your requests and work on providing access. A reserves team member will reach out to inform you of any item requests that we are unable to supply.
Please note that while we do our best to provide access to all items requested, some materials may not be available in a format that the library can purchase, such as content that is exclusive to a streaming service.
Reactivate film requests
To reactivate film requests that were previously on reserve for your course, please follow the instructions on reactivating a reserves list in Canvas or in Course Reserves for non-Canvas users of our service.
There is no separate method to reactivate film requests, the entire reserves list must be reactivated. Film requests will not automatically reactivate when a Canvas page is created or reactivated. All reactivated requests will be reviewed and activated again for the current semester after a reserves list has been reactivated.
Creating new sections in your reading list
The Library’s Course Reserves service provides instructors with more options to organize and structure their reserves materials. You can create new Sections to list reserves materials by week, item type, etc.
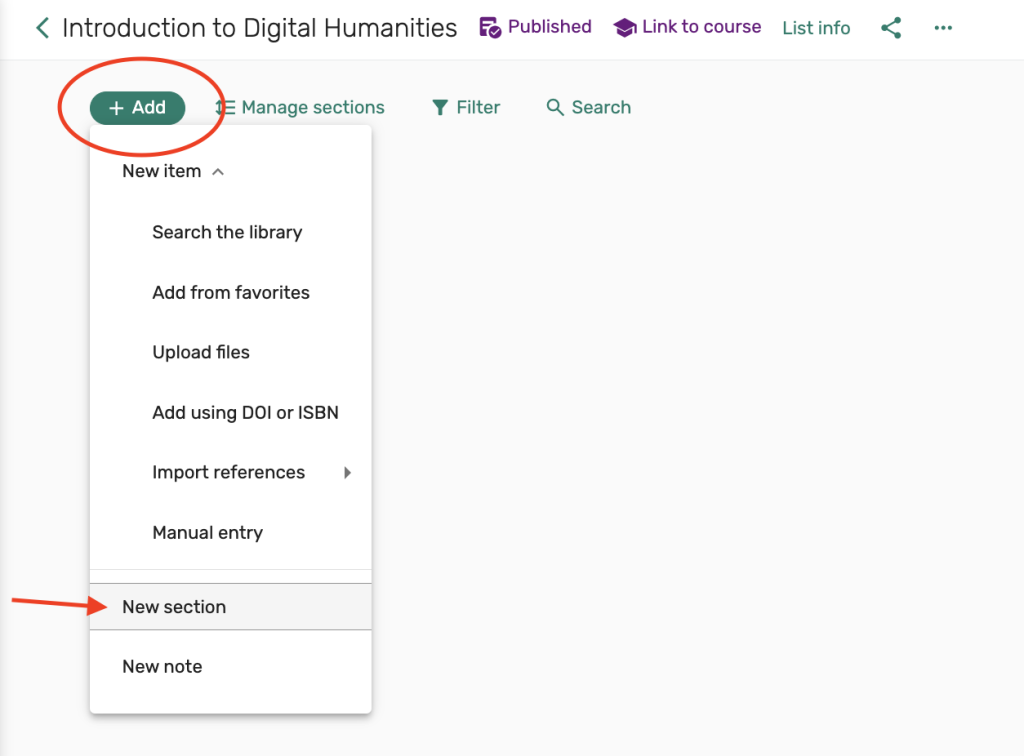
1. While viewing your reserves list, to add a new section, go to Add and then select the option for New section.
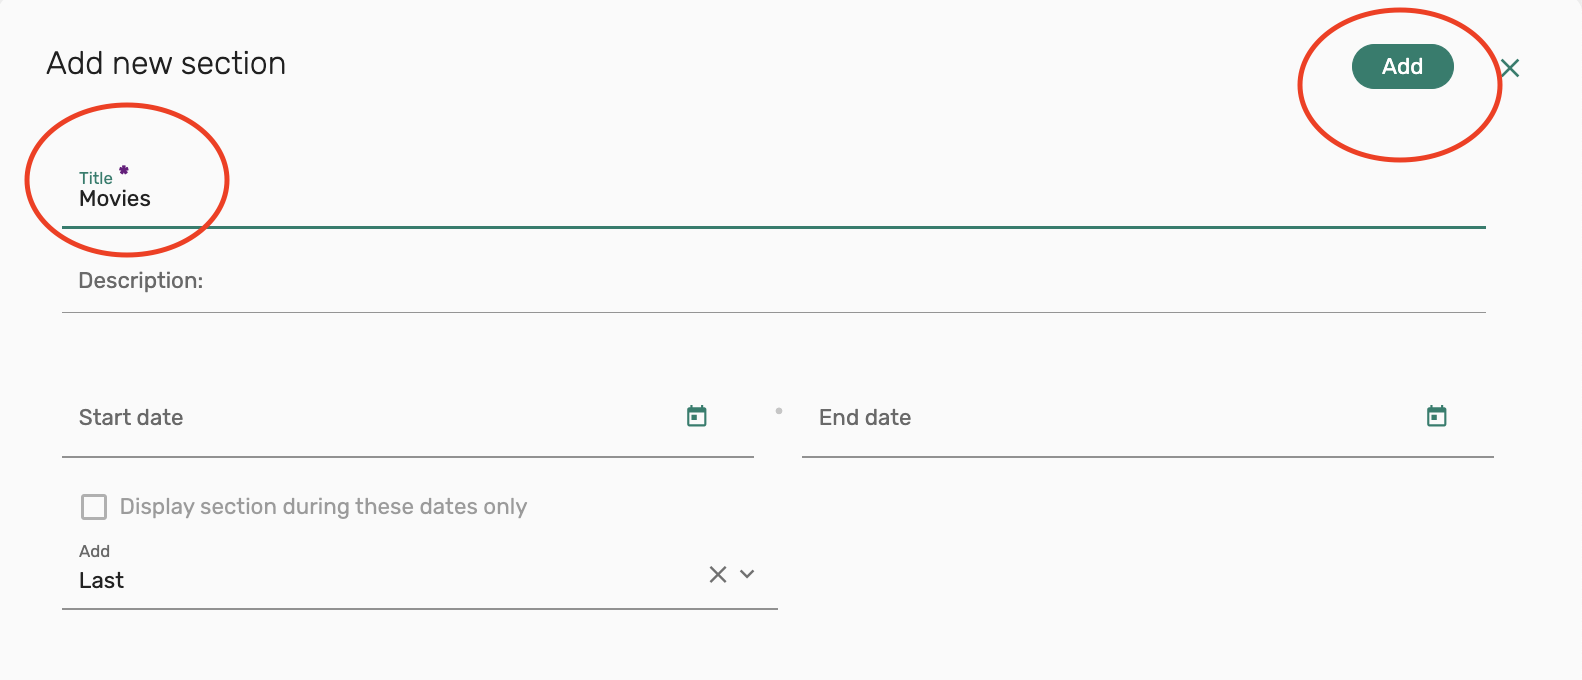
2. In the Title field, enter the name of your section. In the example below, the section is titled “Movies”.
You may choose to enter some additional information such as an optional description and start and end dates for the section. Select Add to add the section to your list.
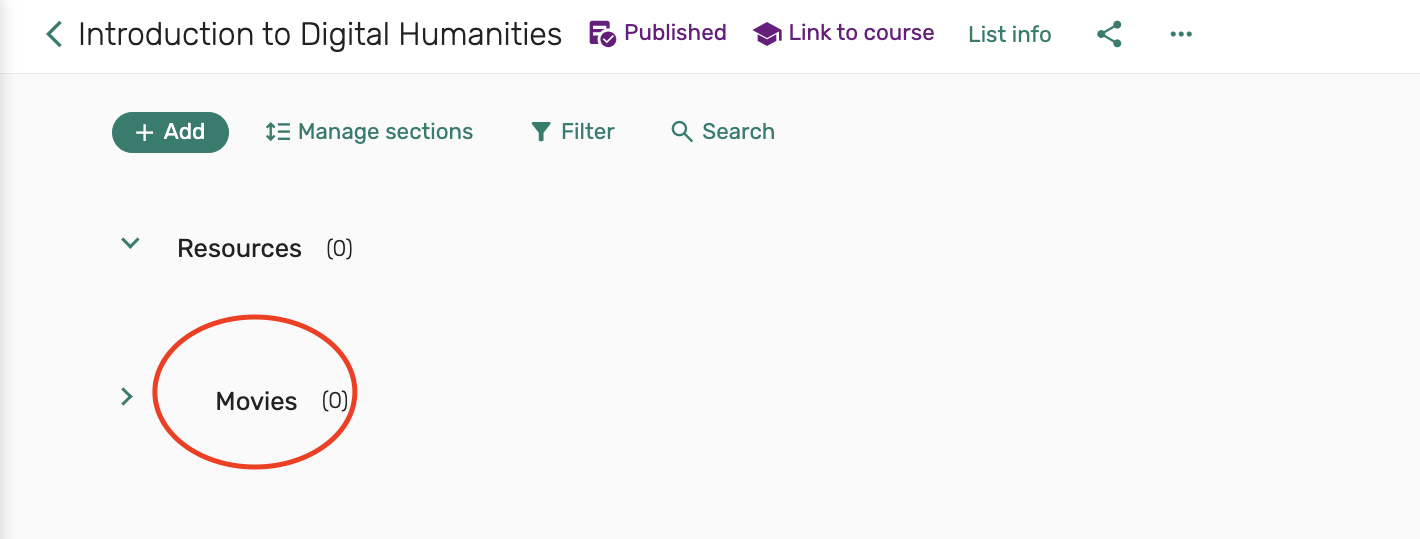
3. Your new section has been added to your list and can be seen listed underneath the original Resources section.
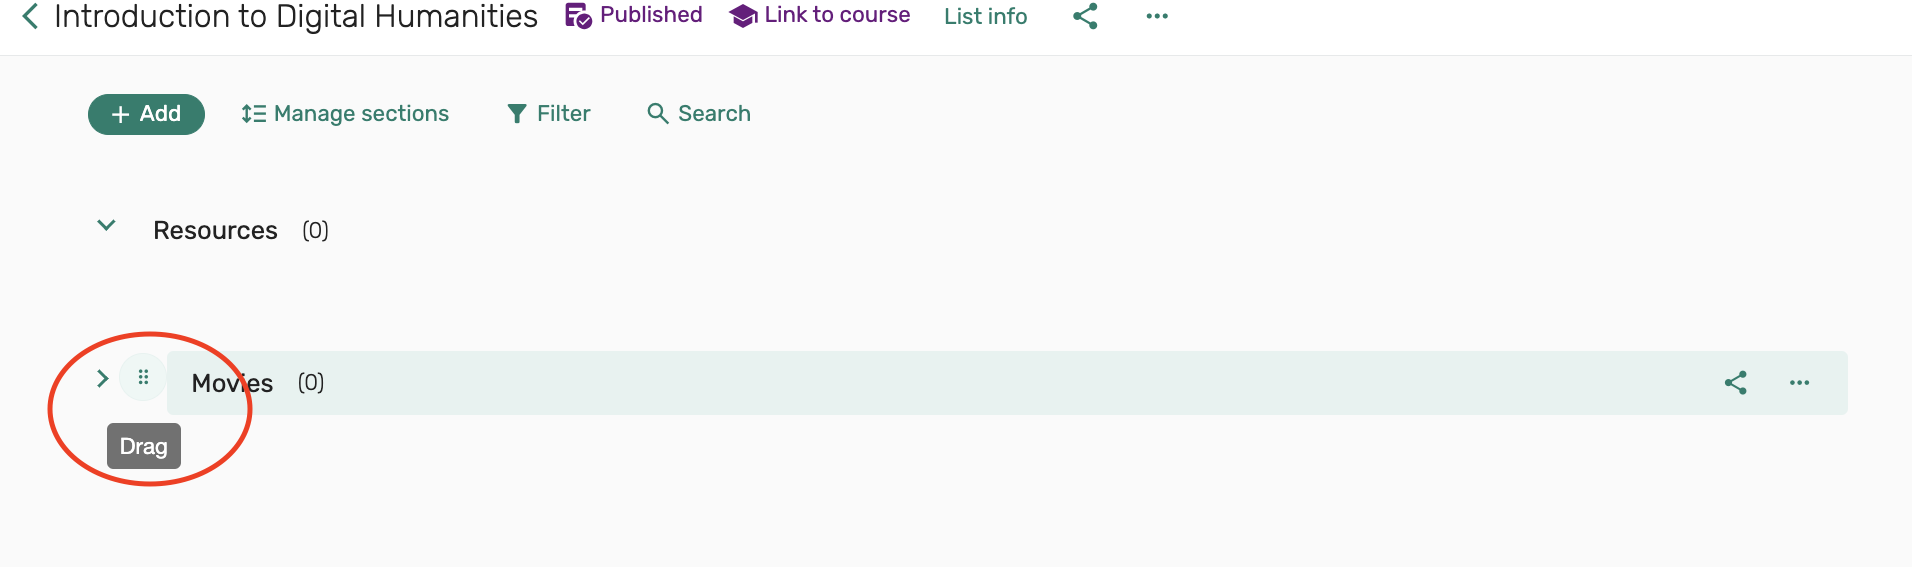
4. To reorder sections, click on the section you wish to move and drag and drop to your desired location.
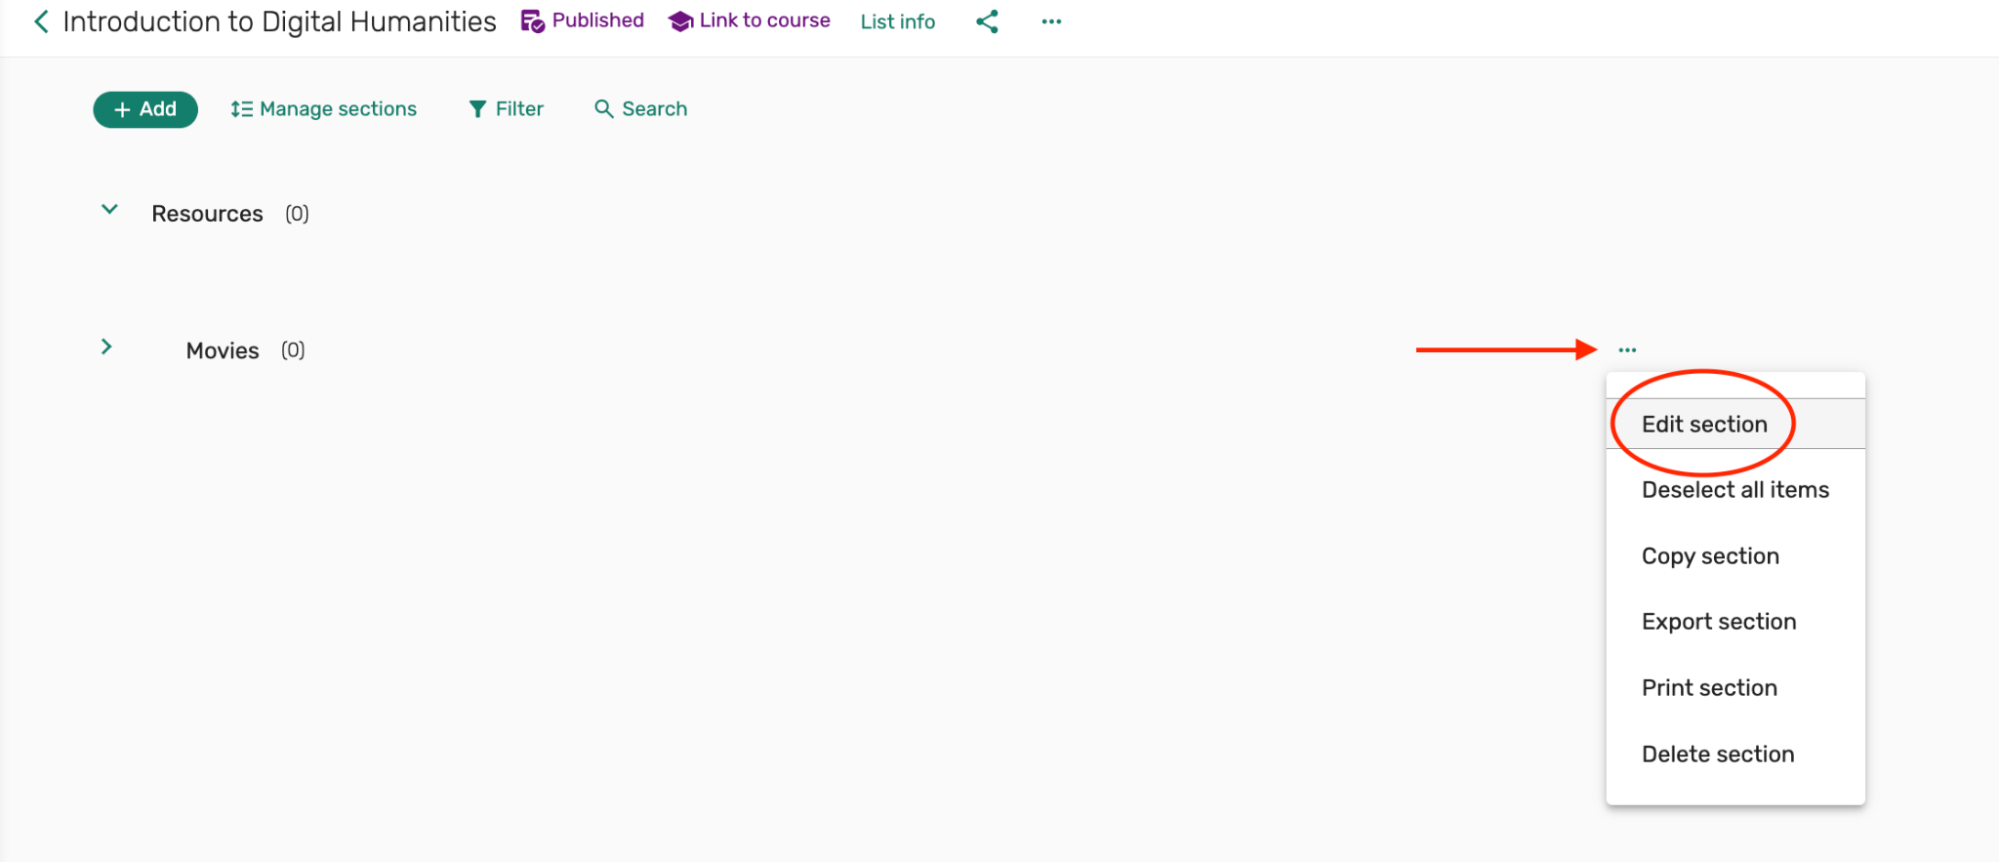
5. You may also edit section information by clicking on the ellipsis to the right of the section name and select Edit section.
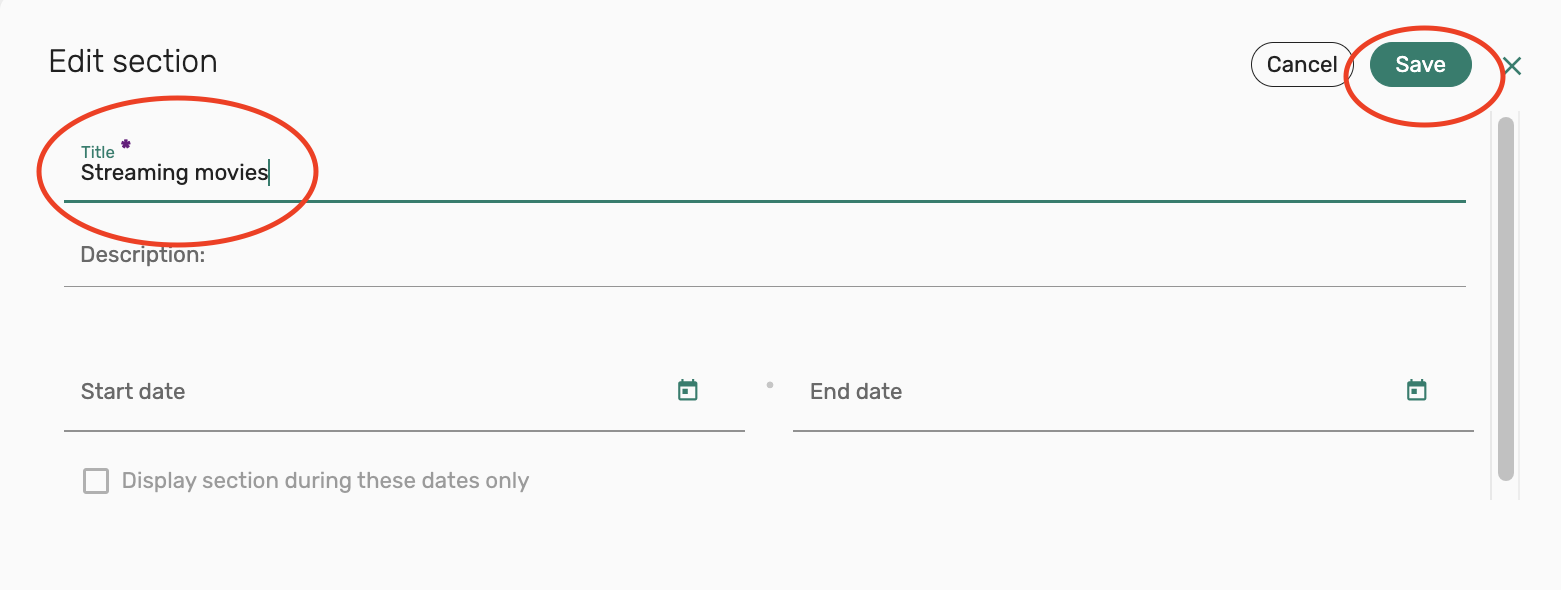
6. This opens a dialog box allowing you to change the title, dates, and description of the section. Click Save when you have made all of your changes.
Editing request citations
The Search the library tool automatically includes informational metadata from items in the Library’s BruKnow catalog into your request citation.
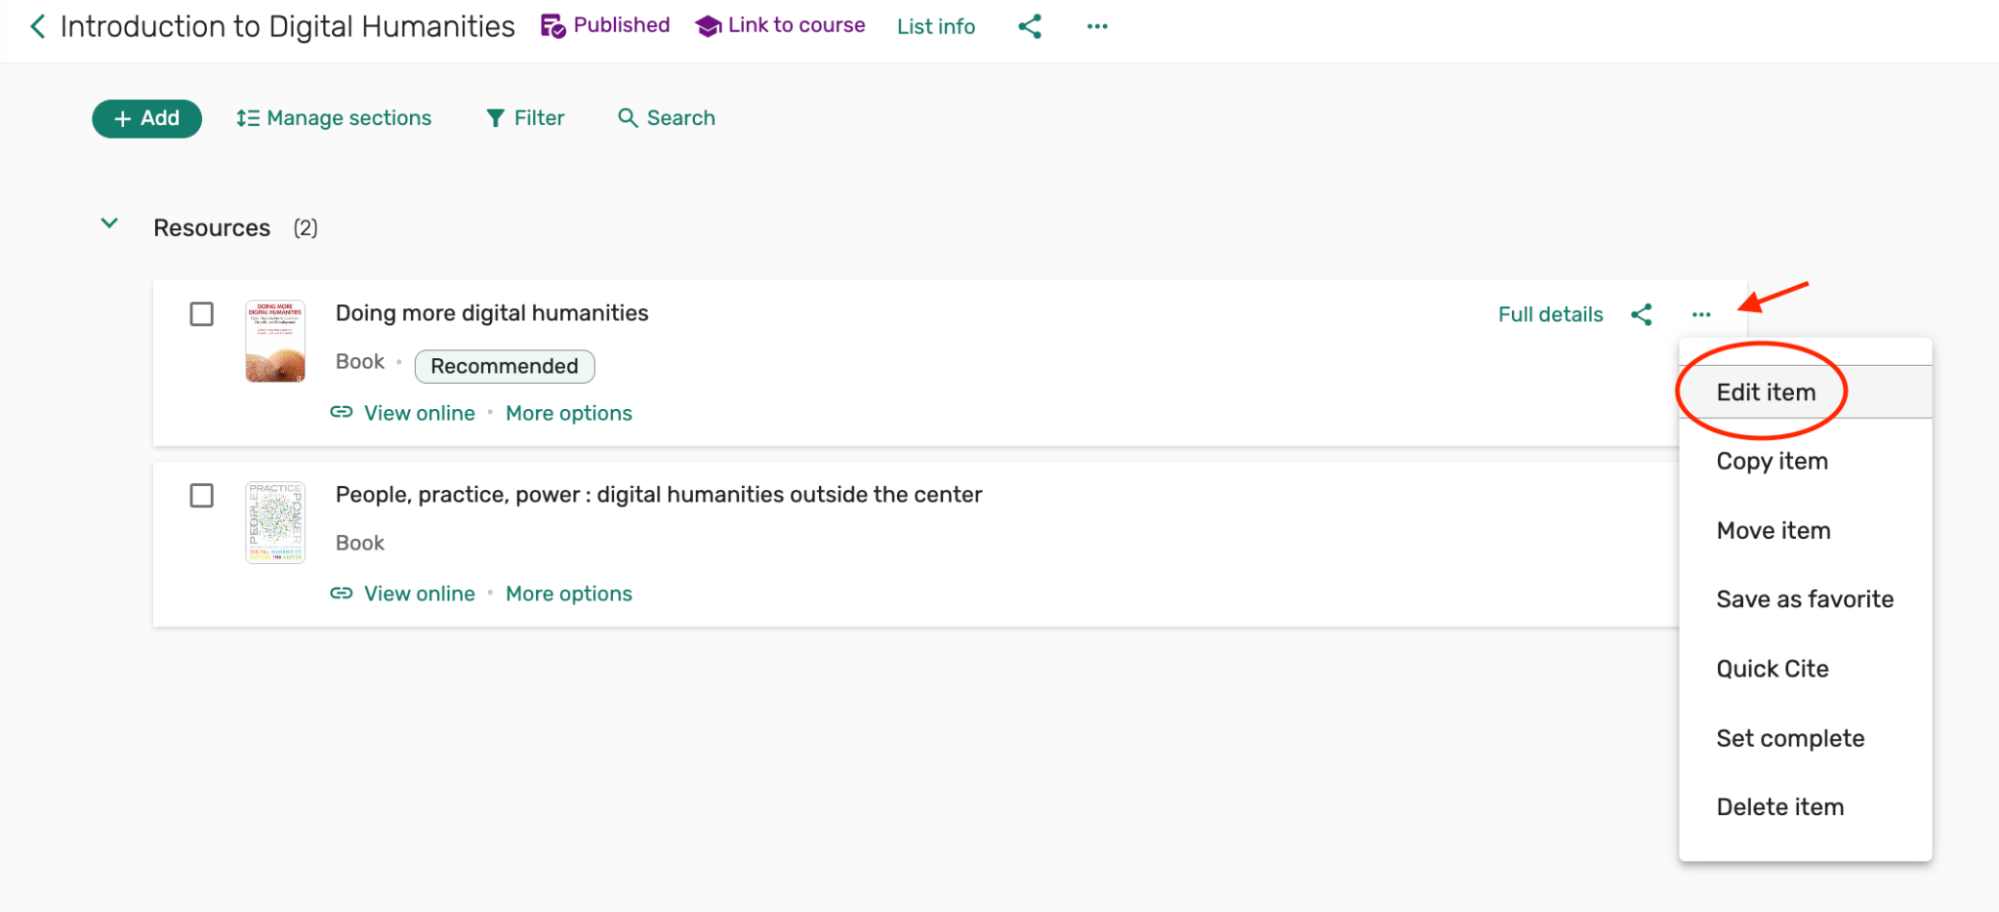
1. If you want to add more information to the item, click the ellipsis next to the item title and select Edit item. This will open a dialog box where you can edit the metadata.
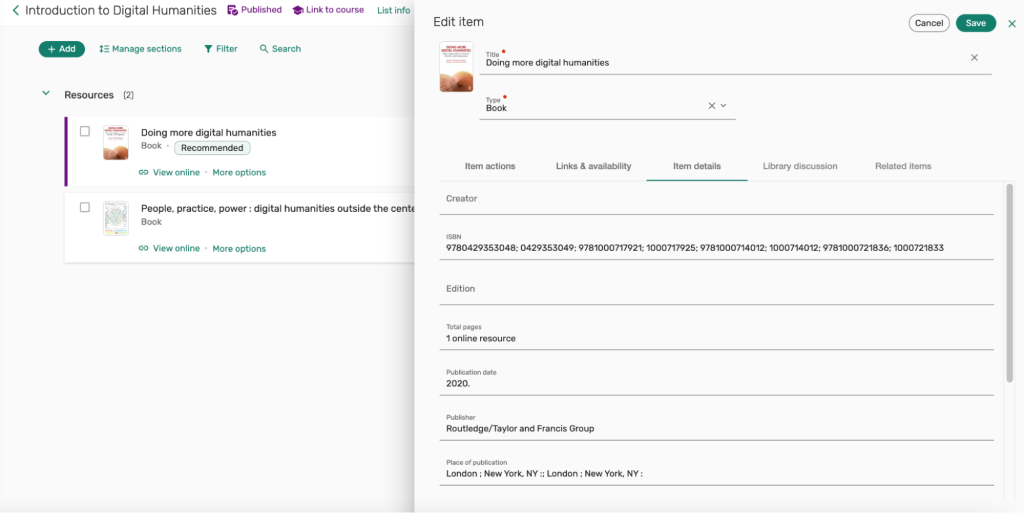
2. Clicking on the citation will open the item information with additional editing options. Select from the different fields to edit the item citation information. Some editing options include:
- Add a reading Due Date
- Add or edit a URL
- Add a note to the citation for students
- Set dates for the visibility of the citation and item
- Add a tag
- Change the format type
- Edit the item citation and metadata
3. After editing your citation, make sure to save your changes by selecting the Save button in the upper right corner of the citation.
Delete a request citation
Citations for resources that are no longer needed in a reading list can be deleted directly from the item or resource citation.
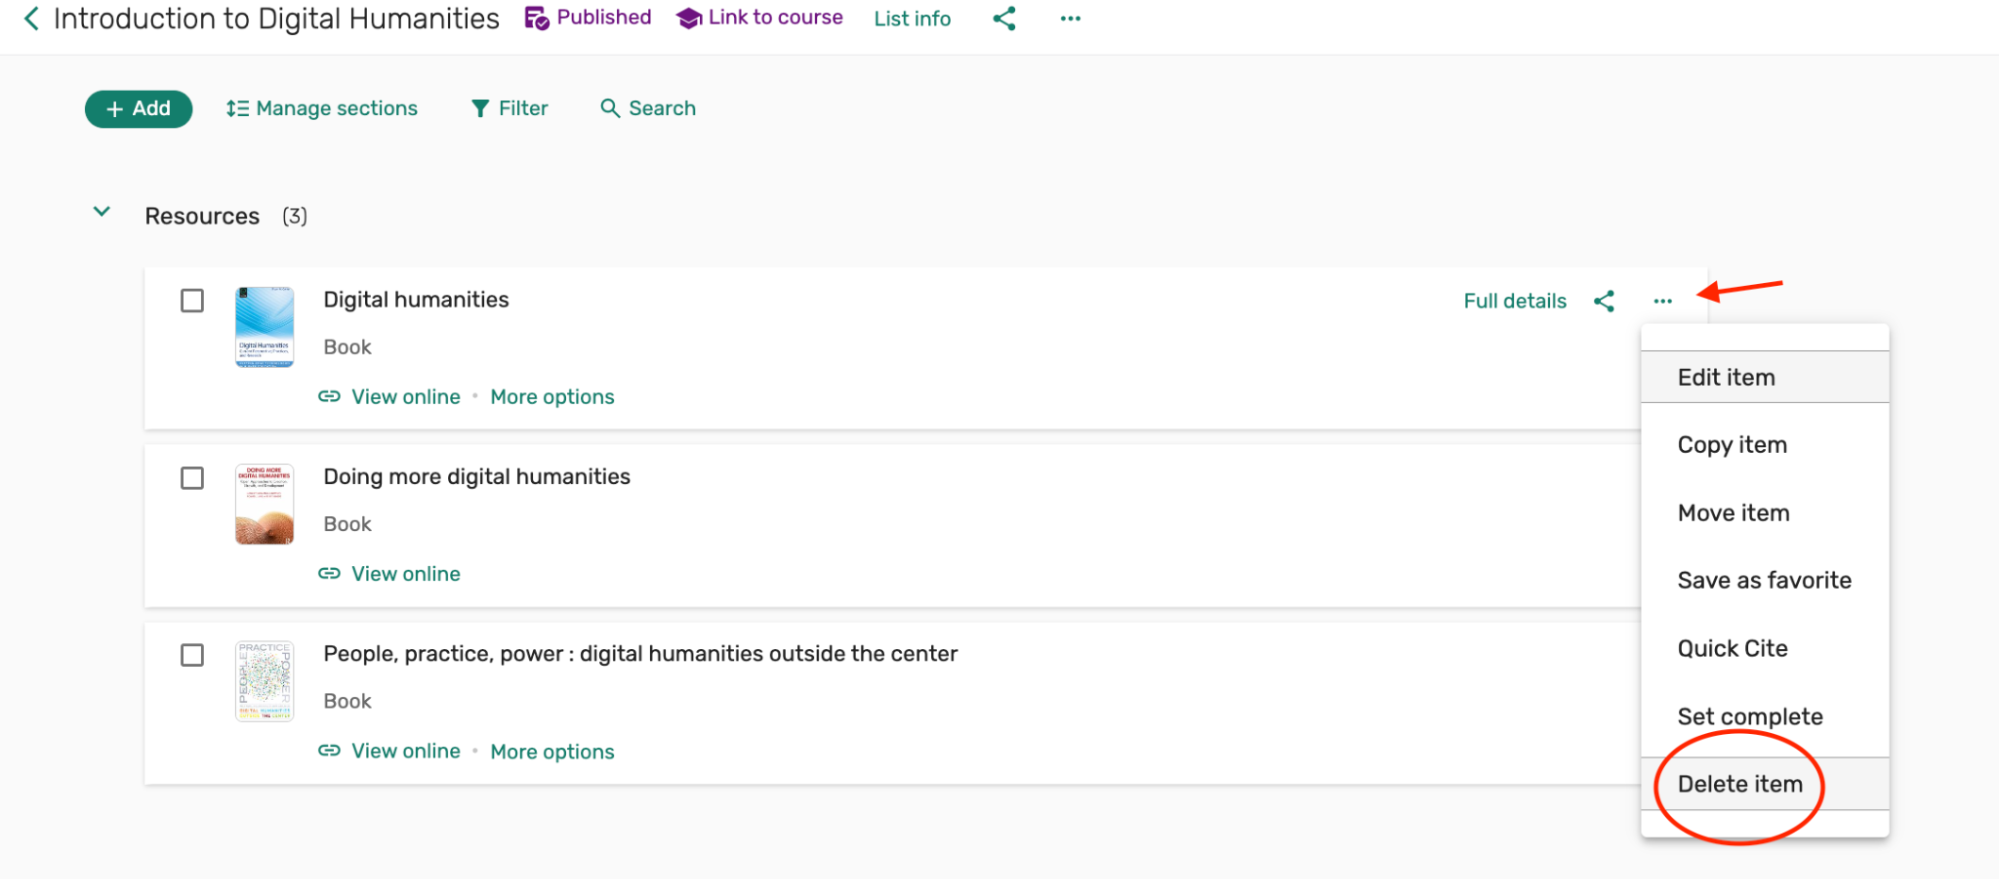
1. Delete an item request citation from your reading list by clicking on the ellipsis to the right of the citation that you would like to delete and selecting Delete item.
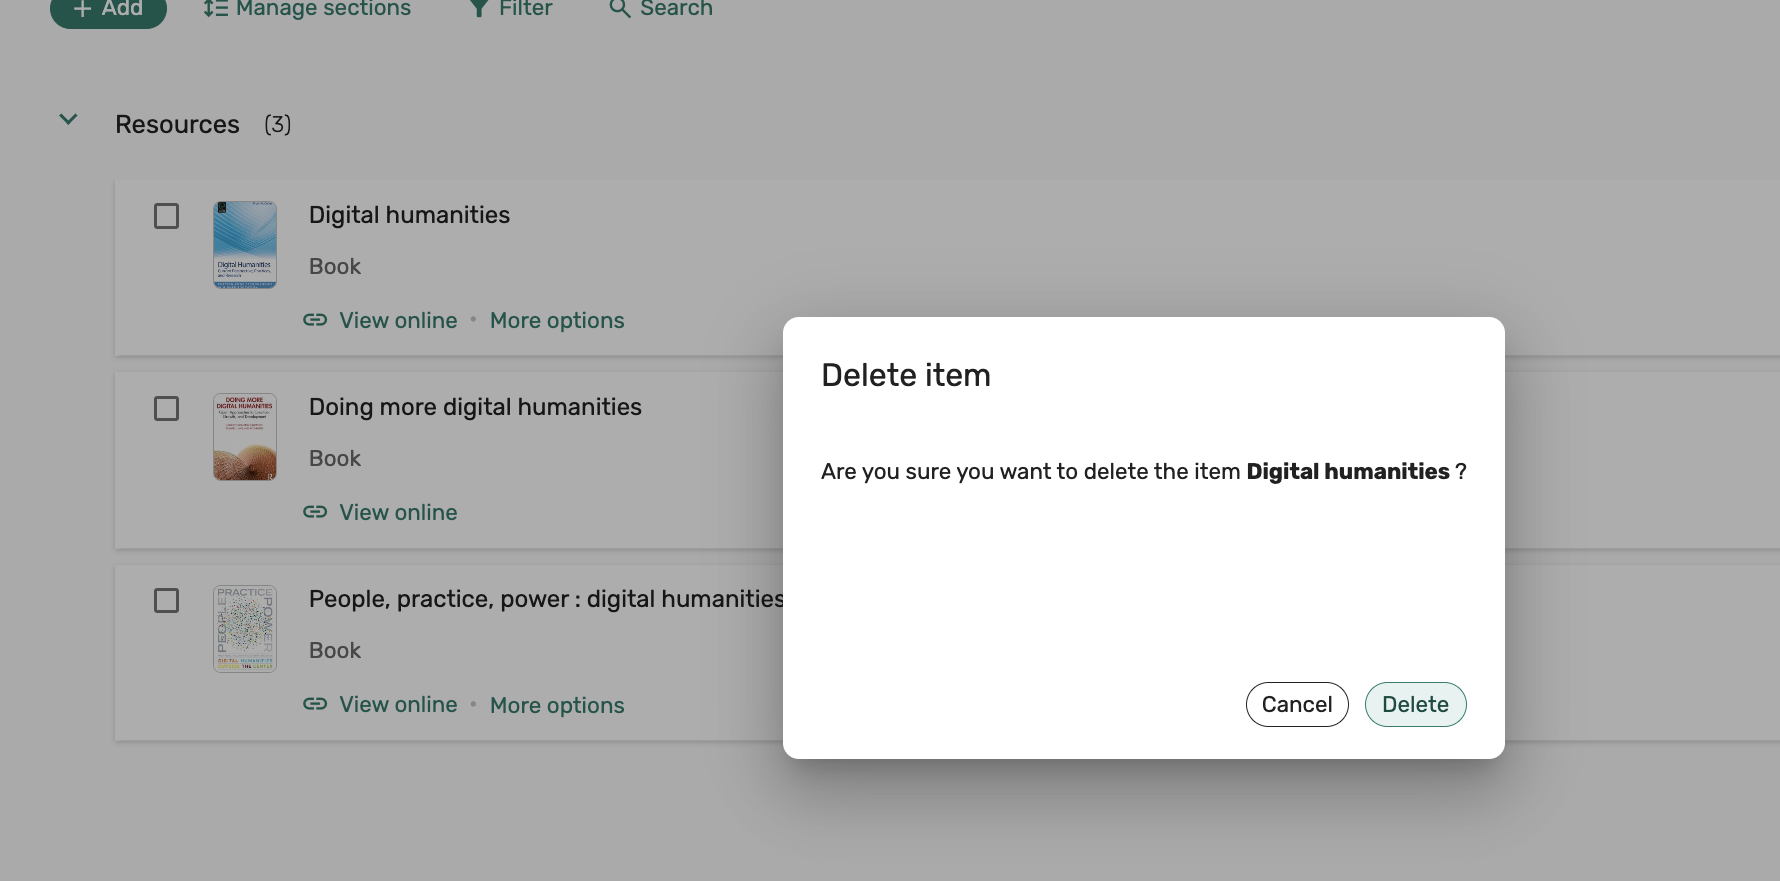
2. Next, you’ll see a message pop up asking you to confirm deletion of the citation. Click Delete to continue with removing the citation from your list.
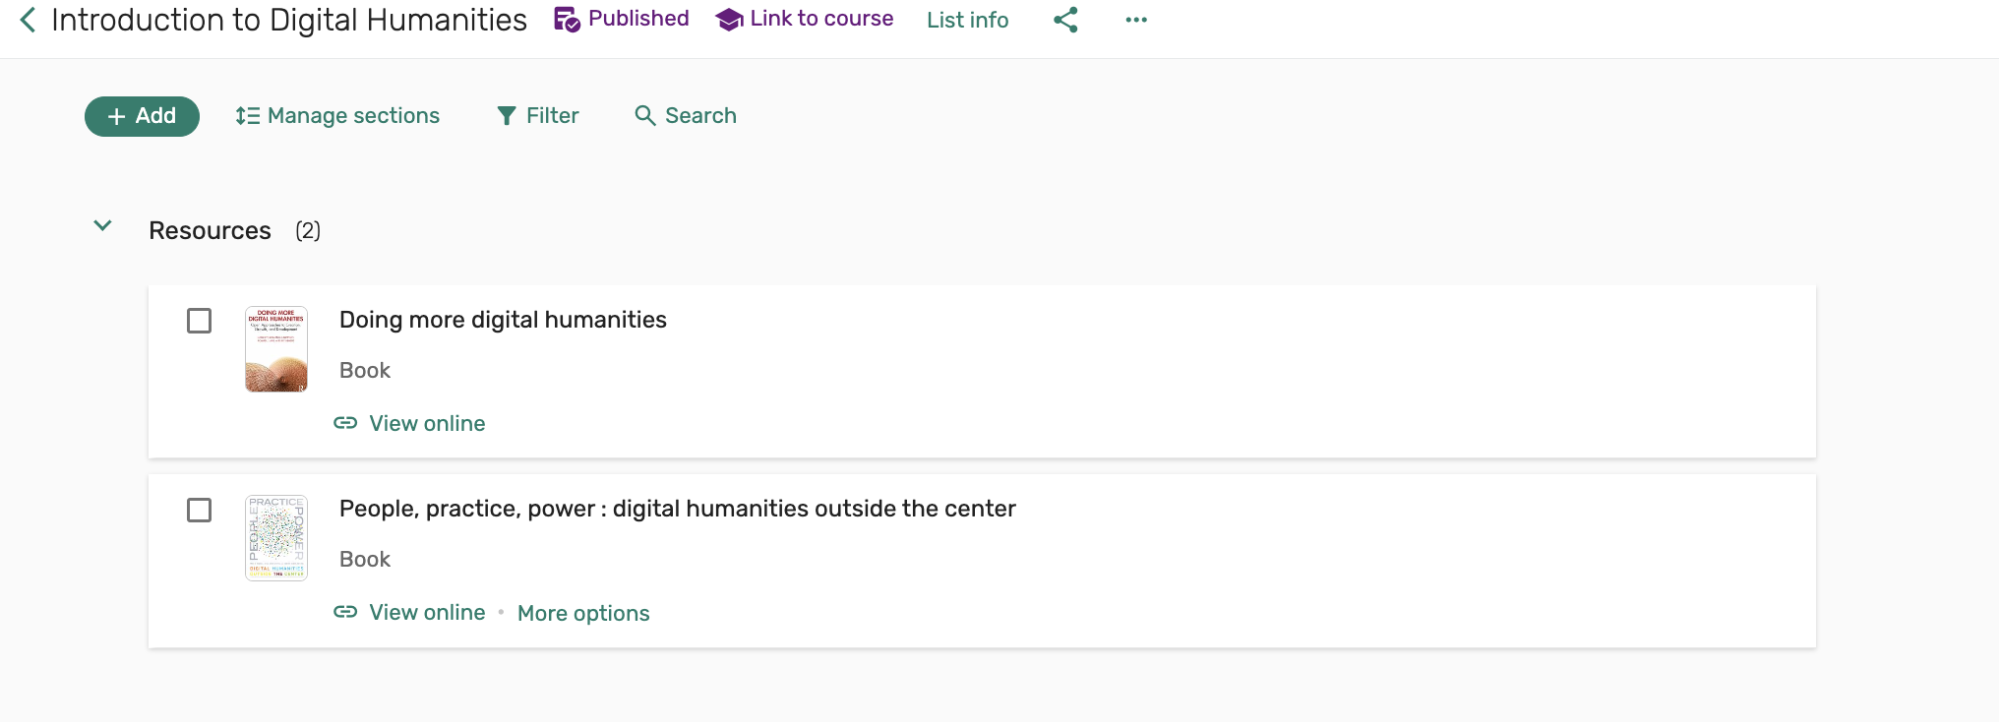
3. The citation has now been deleted and removed from your reserves list. This should be reflected immediately in your list of resources.
4. Continue these steps to remove any other citations from your reserves list that are no longer needed.
Using tags
Tags is a feature within Course Reserves to inform your students of your preferences regarding an item.
Tags that are currently available for use within a request citation can be used to convey significance of a reading for your students:
- Essential
- Recommended
- Optional
- Lecture Readings
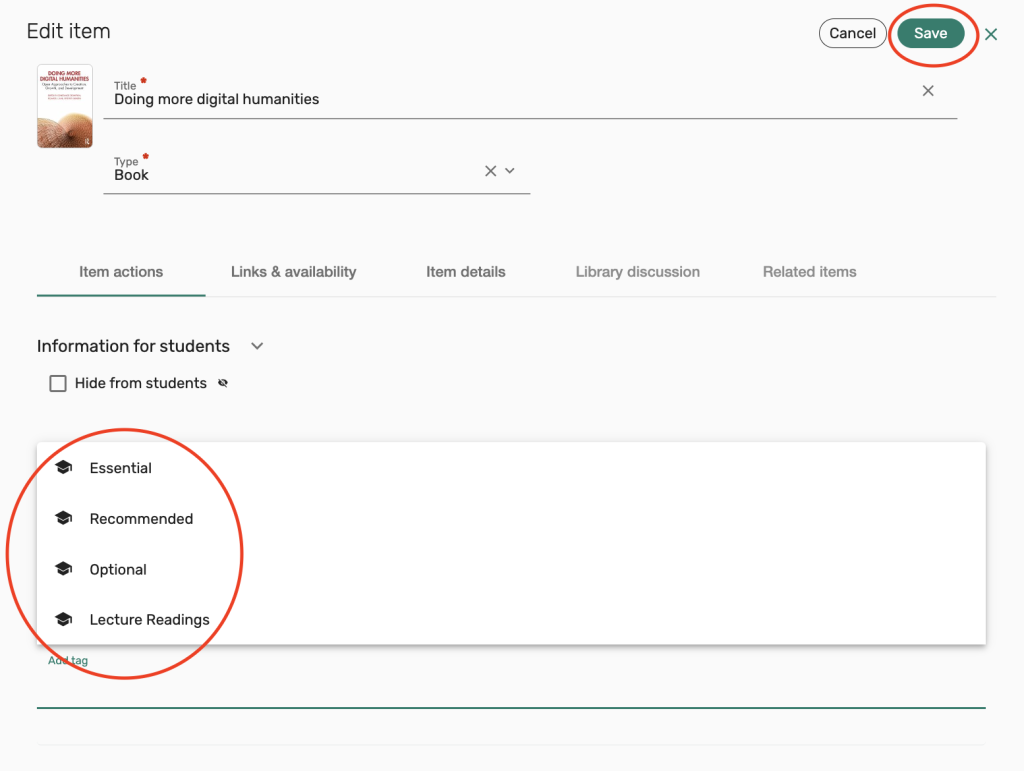
1. To add a tag to an item, while viewing the request citation in Course Reserves, select the ellipsis and select Edit item

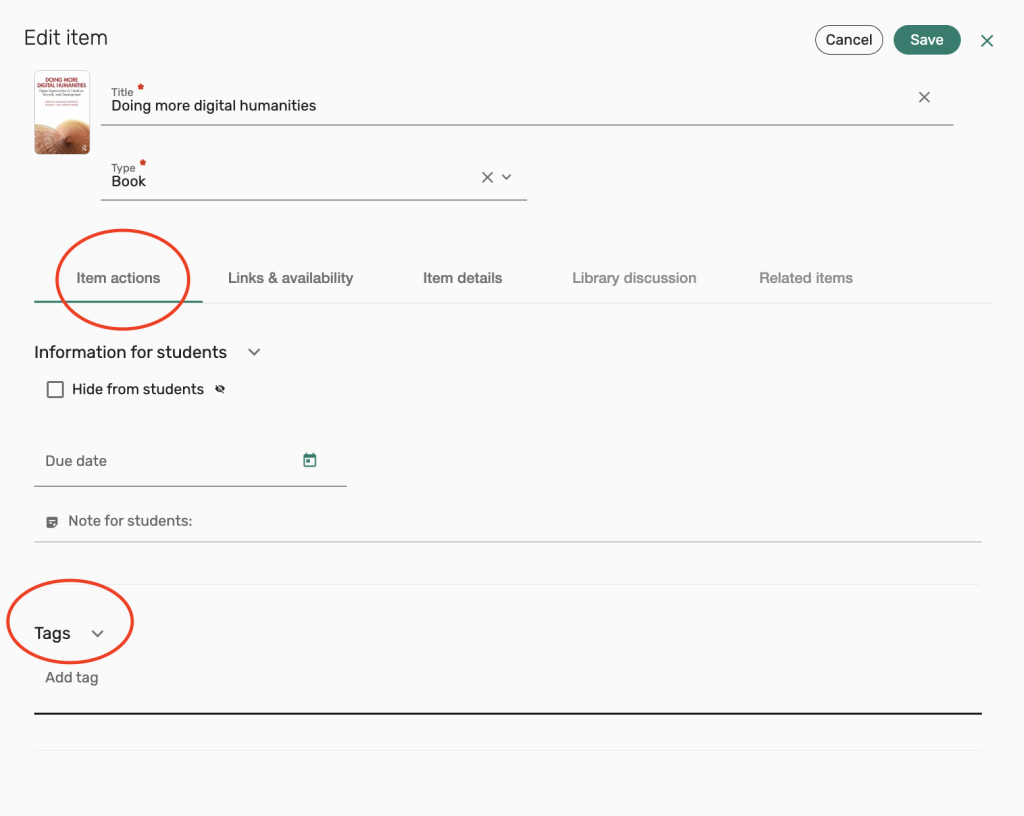
2. From the options displayed, select Item actions. Towards the bottom of the section under Tags, select “Add tag” to view available tags and add one to your reading citation.
3. Click on the Tag that you would like to assign to your citation. After selecting the Tag, don’t forget to click Save.
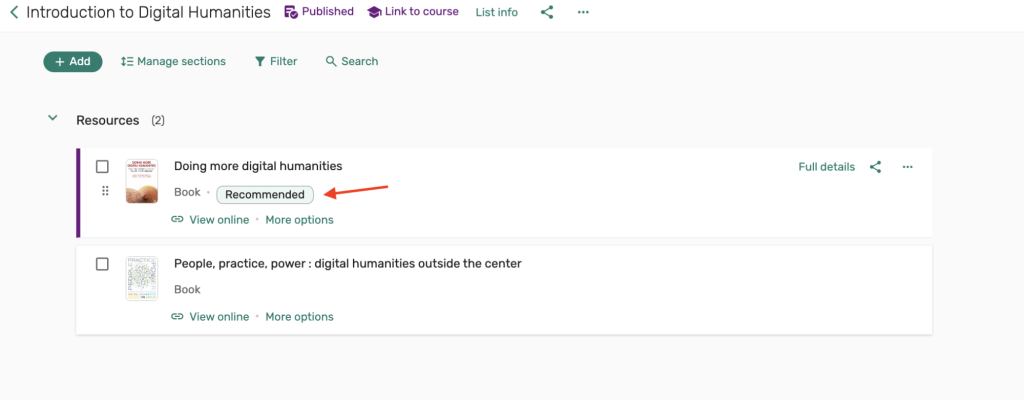
4. Your citation has now been tagged, and you’ll see the Tag appear in the request citation when viewing it from your list.
5. Repeat these steps to add Tags to any other citations in your reserves list.
Adding a deputy or collaborator to manage your list
To make someone a deputy or collaborator so that they can manage your reserves list on your behalf, please send your request to our reserves team at rock-reserves@brown.edu. There is currently no option for instructors to make someone a deputy/collaborator without staff assistance.
Reporting a broken link
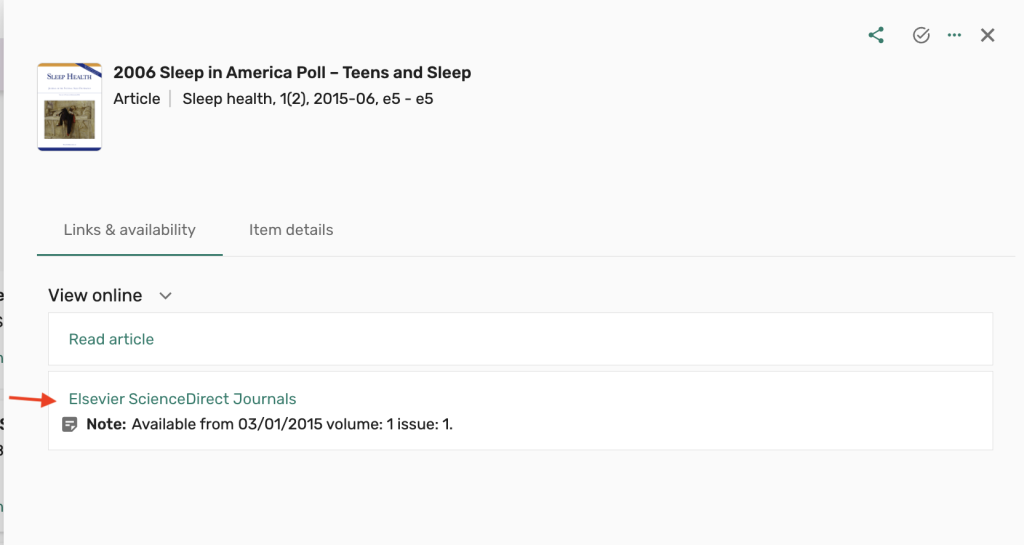
1. To report a resource link as broken, select Full Details from the item citation to open the full item citation and resource links

2. With the citation information displayed, go to the View Online section to view the resource links. More than one resource may be displayed if the Library has access to the resource via multiple vendors.
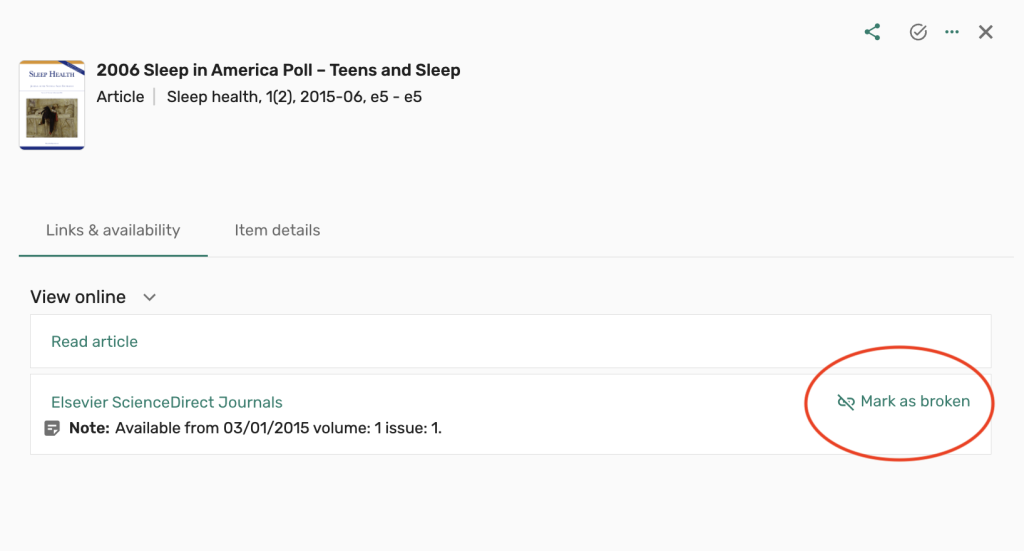
3. To report one of the resources as having a broken link, place your cursor on the citation for the “Mark as broken” link to appear. Select “Mark as broken” to report an issue with the resource.
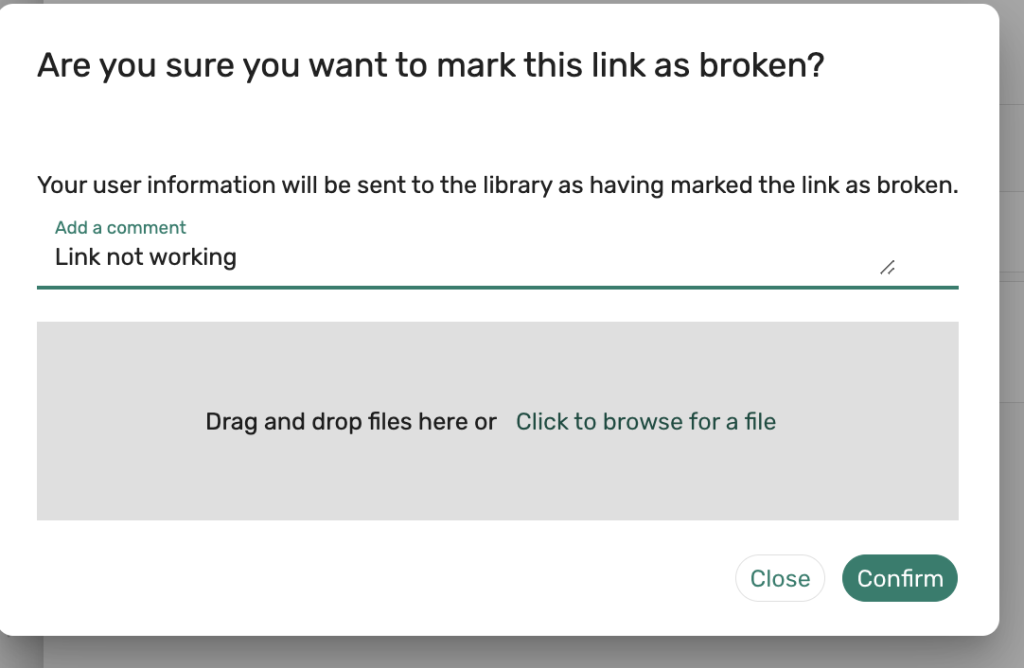
4. You may choose to add an optional comment to provide library staff with further information about the issue in the “Add a comment” field or upload a screenshot of the issue in the section below, Select “Confirm” to submit.
5. Our reserves team will receive the notification about the broken link and will work to resolve the issue. When the issue has been resolved, you’ll receive an email notification informing you that the link has been fixed and is now ready for access.